Does your daughter’s room feel cluttered with toys, clothes, and treasures? You can transform that chaos into an organized paradise. Smart solutions make cleanup easy while teaching valuable organizational skills.
Good design turns functional furniture into beautiful pieces that reflect personal style. These concepts work for kids of all ages, from little ones to teenagers with changing tastes.
This guide covers everything from planning to creating a space that’s both practical and pretty. You’ll discover colorful, creative ways to keep things tidy while making the bedroom a special retreat.
We’ll explore various approaches that match your girl’s unique personality. Get ready to create a room she’ll love spending time in for years to come!
Why Smart Storage is a Game-Changer for Your Daughter’s Room
Ever notice how quickly a tidy space can turn into a mess? Without good organization, chaos takes over fast. Smart solutions change everything, creating order from disorder.
An organized bedroom feels bigger and more inviting. Your daughter can study, relax, or hang out with friends without distraction. Clutter makes it hard to focus or even find favorite items.
Everything stays put with the right systems. Books, clothes, and essentials won’t get buried or lost. Designated spots mean quick cleanups and a neat look every day.
Good habits start young. Your girl learns responsibility by caring for her belongings. She gains skills that help her now and as she grows.
The right approach makes small rooms feel spacious. It adapts to changing needs from childhood through teen years. Personalized solutions work for hobbies, collections, or daily use.
Maintenance becomes simple with everything in its place. Daily tidying takes minutes, not hours. Investing in quality organization pays off for years to come.
You create a peaceful retreat that supports all activities. Reduced stress and better focus become natural benefits. The entire space functions better while looking great.
First Steps: How to Plan Your Girl’s Bedroom Storage Overhaul
Ready to transform your daughter’s room into an organized haven? Smart planning makes the process smooth and successful. A thoughtful approach ensures everything finds its perfect place.
Start by looking at the current setup with fresh eyes. Notice what works and what causes daily frustration. This honest assessment forms your foundation for change.
Assessing Your Space and Her Needs
Grab a tape measure and notebook before making any decisions. Document the room’s dimensions, including window and door placements. This helps visualize potential layouts.
Consider how your daughter actually uses the space daily. Does she read in bed? Do crafts at her desk? These habits determine what storage solutions work best.
Evaluate existing furniture with a critical eye. Some pieces might serve new purposes with fresh paint or new hardware. Others might need replacement to meet current needs.
Create zones for different activities within the room. Designate areas for sleeping, studying, playing, and displaying treasures. This functional approach makes organization intuitive.
Think about both open and closed storage options. Favorite books and collectibles deserve display space. Everyday clutter benefits from hidden organization.
Plan for growth and changing interests. Systems that work today should adapt tomorrow. Flexible solutions prevent another overhaul next year.
Involving Her in the Process for a Room She’ll Love
Your daughter’s input transforms functional storage into a personal sanctuary. Her participation creates ownership and pride in the space. She’ll more likely maintain what she helps create.
Browse Pinterest together or visit furniture stores for inspiration. Notice what colors and styles make her eyes light up. These preferences guide your design choices.
Create an inspiration board with fabric swatches, paint chips, and pictures. This visual guide keeps everyone focused during the transformation process.
As one parent discovered, “With her input, we created a bedroom we both loved.” This collaboration bridges practical needs with personal expression perfectly.
Set realistic expectations about budget and timeline together. Explain what’s possible within your parameters. This teaches valuable planning skills while managing expectations.
Celebrate small decisions along the way. Choosing knobs for drawers or baskets for shelves builds excitement. These moments make the process enjoyable for everyone involved.
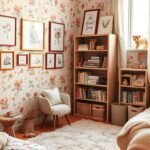
1. Maximize Vertical Space with Wall-Mounted Shelves and Cubby Systems

Your walls can become your most valuable organizational asset. Wall-mounted solutions create order without eating up precious floor area. They work beautifully in compact spaces and larger rooms alike.
These systems keep essentials within reach while maintaining a clean look. You gain display areas for special items and hidden spots for everyday clutter. The approach adapts as your daughter’s needs change over time.
Floating Shelves for Books and Decor
Floating shelves create magic on blank walls. They showcase favorite stories, awards, and collectibles beautifully. These installations make items part of the room’s decor rather than clutter.
Install them above desks or beds for easy access. Vary shelf lengths for visual interest and functional needs. Deeper shelves hold thick albums while narrower ones display small treasures.
Consider weight capacity before loading shelves. Use wall anchors for heavier items like book collections. Space shelves appropriately for the items they’ll hold.
Personalize shelves with paint colors that complement the room’s theme. Add decorative paper or trim to backs for extra flair. These touches make the storage feel intentional and designed.
Wall-Mounted Cubbies for Bedside Storage
Wall-mounted cubbies revolutionize nighttime organization. They replace bulky nightstands while offering similar functionality. The system keeps essentials close without floor footprint.
Mix open and closed compartments within the unit. Open cubbies hold nightly reading material and water bottles. Closed sections store personal items or next-day outfits.
Install cubbies at bedside height for easy reach. Include a small lip on shelves to prevent items sliding off. Consider adding built-in cup holders for drinks.
Use decorative boxes in cubbies for concealed organization. Label containers for quick identification of contents. This approach keeps things tidy while maintaining accessibility.
Safety matters with wall-mounted systems. Secure all installations properly into wall studs. Avoid placing heavy items where they might fall onto the bed.
| Item Type | Recommended Shelf Depth | Ideal Spacing |
|---|---|---|
| Paperback books | 6 inches | 10 inches apart |
| Hardcover books | 8 inches | 12 inches apart |
| Decorative boxes | 10 inches | 14 inches apart |
| Stuffed animals | 12 inches | 16 inches apart |
| Trophies/awards | 8 inches | Varies by item size |
Explore unused wall areas throughout the room. Space above windows often works well for shallow displays. Corners accommodate angled shelving for maximum efficiency.
Combine different cubby sizes within one system. Larger compartments handle bulkier items like blankets. Smaller ones organize school supplies or art materials.
Remember that vertical solutions grow with your child. She can rearrange displays as interests evolve. The systems support changing needs from childhood through teen years.
2. Choose Multi-Functional Furniture That Does Double Duty
Your daughter’s room can become more functional without losing charm. Smart furniture choices make the most of every square foot. These pieces serve multiple purposes while keeping the space organized.
Multi-purpose items reduce clutter and increase usability. They help create zones for different activities. Your girl gains more room to play, study, and relax.
Desks That Double as Nightstands
A compact desk can serve as both workspace and bedside table. This approach saves precious floor area in smaller rooms. The surface holds a lamp, books, and nighttime essentials.
Choose a desk with built-in drawers or shelves. These provide hidden spots for personal items. The design keeps everything within easy reach.
Opt for a stool instead of a bulky chair. It tucks neatly underneath when not in use. This creates a clean look and prevents tripping hazards.
As one designer notes,
“Dual-purpose furniture transforms how we use small spaces. It’s practical magic that makes rooms feel larger.”
Storage Ottomans for Seating and Stashing
Storage ottomans offer comfortable seating while hiding belongings inside. They work well at the foot of the bed or near a reading nook. Your daughter can stash blankets, books, or extra clothes secretly.
These versatile pieces come in various sizes and styles. They provide extra seating for friends during sleepovers. The lid lifts to reveal ample space for organization.
Choose ottomans with sturdy construction for daily use. Look for smooth-closing hinges and durable fabric. Safety matters with furniture that gets frequent use.
| Furniture Type | Primary Function | Secondary Function | Best Room Placement |
|---|---|---|---|
| Desk/Nightstand | Study surface | Bedside storage | Next to bed |
| Storage Ottoman | Seating | Hidden storage | Foot of bed |
| Bench with Storage | Seating | Blanket storage | Window area |
| Bookshelf Headboard | Bed support | Book display | Behind bed |
| Bed with Drawers | Sleeping | Clothing storage | Center of room |
Other smart options include benches with hidden compartments. These work well at room entry points or under windows. Beds with built-in drawers maximize under-bed space efficiently.
Bookshelf headboards provide display space without extra furniture. They hold reading material and decorative items within arm’s reach. This creates a cozy reading nook right in bed.
Consider your daughter’s current needs and future growth. Furniture should adapt as her interests change. Pieces that scale appropriately prevent frequent replacements.
Arrange multi-functional items to create distinct zones. Place the desk near natural light for studying. Position ottomans where seating gets most use.
These solutions combine practicality with visual appeal. They keep the room tidy while reflecting personal style. Your daughter enjoys both function and beauty in her space.
3. Utilize the Often-Ignored Space Under the Bed
That empty area beneath the mattress holds incredible potential. Many people overlook this valuable real estate in their organization plans. You can transform this unused space into a functional storage zone.
Under-bed areas work beautifully for various storage needs. They keep items accessible yet out of sight. This approach maximizes every inch of your girl’s room.
Measure the clearance height before selecting containers. Most standard beds offer 6-12 inches of vertical space. Custom solutions can accommodate different mattress heights.
Consider your daughter’s specific organizational requirements. Different systems work for various types of belongings. The right choice depends on what needs storing.
Roll-Out Drawers for Clothes and Toys
Roll-out drawers provide excellent organization for frequently used items. They glide smoothly on wheels or tracks. These systems make retrieval and replacement effortless.
Many bed frames now include built-in drawer options. Some trundle beds feature storage instead of extra sleeping space. These drawers pack valuable organization into otherwise wasted areas.
Use these compartments for folded clothing collections. They work perfectly for sweaters, jeans, and casual wear. This approach can reduce dresser needs significantly.
Toys and games also fit beautifully in these drawers. Larger items like building sets or doll collections organize neatly. Everything stays contained yet easily accessible.
Safety matters with roll-out systems. Ensure drawers have smooth-glide mechanisms. Check weight capacity before loading heavily.
Open Baskets for Easy-Access Essentials
Open baskets offer simple, flexible organization solutions. They slide easily under most bed frames. These containers work well for items used regularly.
Choose baskets with low profiles for easy sliding. Wicker, fabric, or plastic options all work beautifully. Select materials that complement the room’s decor style.
These are perfect for bedtime reading material. They also hold extra blankets or favorite stuffed animals. Your daughter can reach essentials without opening lids.
Clear storage containers provide excellent visibility for contents. You can see what’s inside without opening every box. This saves time during daily routines.
As one organization expert notes,
“Under-bed storage transforms dead space into active organization. It’s one of the smartest solutions for compact rooms.”
Label containers for quick identification. Use simple tags or color-coded systems. This maintains order and simplifies cleanup.
Seasonal items store perfectly in zippered totes. Out-of-season clothes rotate neatly under the bed. This frees up closet space for current wardrobe needs.
DIY options allow for custom sizing and styling. Simple wooden crates on casters work wonderfully. Fabric-covered boxes add decorative touches.
Remember to consider weight distribution across the bed frame. Heavier items should sit toward the center. Lighter belongings can go around the edges.
This approach keeps the floor clear and room feeling spacious. Your daughter gains valuable organization without sacrificing style. The entire space functions better with this smart solution.
4. Declutter Drawers and Surfaces with Simple Organizing Systems

Ever open a drawer and find everything jumbled together? Simple systems can turn that chaos into order. You create a calm environment where everything has its place.
These approaches work for any size room. They help maintain neatness without constant effort. Your daughter enjoys a space that supports her daily activities.
Using Trays and Dishes as Drawer Dividers
Small containers transform messy drawers instantly. They separate items by type and purpose. You can see everything at a glance without digging.
Measure your drawers before selecting dividers. This ensures everything fits perfectly. Consider depth and width for optimal organization.
Pretty dishes work beautifully for smaller items. They corral hair accessories or art supplies neatly. Choose materials that complement the room’s decor.
Vintage finds add character while serving practical needs. An old ceramic dish might hold jewelry perfectly. Repurposed items make organization feel special.
Label each section for easy identification. Your daughter knows where things belong. This encourages consistent tidying habits.
Decorative Trays to Corral Desktop Clutter
Desktop surfaces often collect random items. A lovely tray gathers everything into one spot. It creates intentional organization rather than scattered clutter.
Choose trays with raised edges to contain smaller pieces. They prevent items from sliding off surfaces. This works well on desks or bedside tables.
As one organizer shares,
“A beautiful tray turns necessary clutter into styled display. It’s functional decor that makes spaces feel purposeful.”
Sort items into smaller containers within the tray. Use tiny bowls for paper clips and erasers. This system keeps everything accessible yet organized.
The approach reduces visual stress significantly. Your daughter focuses better in an orderly environment. She develops habits that support lifelong organization.
Regular reassessment maintains the system’s effectiveness. Adjust categories as needs change over time. This flexible approach grows with your child.
5. Incorporate a Loft Bed to Free Up Floor Space for a Desk or Seating
Imagine creating a whole new activity zone without expanding the room’s footprint. Loft beds elevate the sleeping area, opening up valuable real estate below. This smart approach transforms cramped quarters into multifunctional spaces.
These elevated sleeping solutions work beautifully in compact areas. They create dedicated spots for studying, playing, or relaxing. Your daughter gains distinct zones for different activities within one room.
Measure your ceiling height before selecting a loft bed. Standard designs require at least 8 feet of vertical clearance. This ensures comfortable movement both above and below.
Consider your girl’s specific needs when configuring the space. A built-in desk creates an ideal homework station. Comfortable seating forms a cozy reading nook for quiet time.
Safety remains paramount with elevated sleeping arrangements. Look for sturdy guardrails on all open sides. Secure ladders must attach firmly to the frame.
As one designer explains,
“Loft beds revolutionize small space living. They provide privacy and functionality in one brilliant package.”
Customize the area beneath with personal touches. Add curtains for a private hideaway feeling. String lights create warm ambiance for evening activities.
Electrical access matters for functional workspaces. Install outlet strips within easy reach. Proper lighting prevents eye strain during study sessions.
These solutions grow with your child through different stages. Younger kids enjoy the adventure of climbing to bed. Tweens appreciate the private retreat below.
Weight limitations vary by design and materials. Check manufacturer specifications before purchasing. Distribute weight evenly across the structure.
The right loft bed becomes the room’s centerpiece. It maximizes every square foot while maintaining style. Your daughter enjoys both practicality and personality in her space.
6. Get Creative with Over-the-Door Storage Solutions
That often-overlooked space behind doors holds amazing potential. You can turn unused areas into smart organization zones. This approach maximizes every inch without changing your room’s layout.
Over-the-door systems keep essentials within easy reach. They work beautifully in compact spaces where floor area matters most. These solutions help maintain order while adding functional charm.
Racks for Shoes, Accessories, and Supplies
An over-the-door rack transforms how you store daily items. It keeps shoes organized and accessible. This method saves precious closet or floor space effectively.
Various organizers suit different needs perfectly. Clear plastic pockets work well for school supplies. Fabric holders corral accessories like scarves and belts neatly.
Shoe racks feature multiple tiers for footwear collections. They prevent piles from forming near entry points. Your space stays tidy while everything remains visible.
Choose materials that match your room’s decor style. Metal racks offer durability for heavier items. Lighter options work for accessories and smaller pieces.
Hooks on the Closet Door for Outfit Planning
Install hooks on the closet door for wardrobe management. They provide perfect spots for planning next-day outfits. This system makes morning routines smoother and faster.
Use narrow hooks for frequently worn accessories. Belts, necklaces, and hats hang within easy reach. Plastic holders keep smaller items from getting lost.
As one organization expert notes,
“Door-mounted systems turn wasted space into active storage. They’re among the smartest solutions for compact areas.”
Consider weight capacity when selecting hooks. Heavier coats need sturdier mounting options. Lighter items work with simple adhesive hooks.
| Organizer Type | Best For | Weight Capacity | Installation Type |
|---|---|---|---|
| Shoe Rack | Footwear collections | 15-20 pounds | Over-door hooks |
| Clear Pockets | School supplies | 5-8 pounds | Over-door bar |
| Fabric Organizer | Accessories | 8-12 pounds | Over-door hooks |
| Utility Hooks | Outfit planning | 10-15 pounds | Adhesive/Screws |
| Jewelry Holder | Necklaces/Bracelets | 3-5 pounds | Over-door bar |
DIY options let you customize solutions creatively. Repurpose old baskets with S-hooks for unique charm. Paint matching colors creates cohesive looks.
Safety matters with all door-mounted systems. Ensure proper installation to prevent accidents. Check weight limits before loading organizers fully.
Regular decluttering maintains system effectiveness. Remove unused items monthly to keep things organized. Adjust categories as needs change over time.
These solutions blend seamlessly with room decor. Choose colors that complement existing themes. Your space stays functional while looking great.
7. Add a Pegboard Above the Desk for Customizable Organization

Transform that blank wall space into a dynamic organization center. Pegboards offer incredible flexibility that grows with your child’s changing needs. You create a system that adapts perfectly to different stages and interests.
This approach keeps essentials visible and accessible. Everything has its designated spot while adding personality to the space. The system works beautifully in compact areas where floor space matters most.
Hanging School and Craft Supplies
Pegboards revolutionize how you store learning materials and creative tools. Small hooks hold pencils, scissors, and rulers securely. Clear containers keep supplies visible yet organized.
Arrange items by category or frequency of use. Frequently used materials go at eye level for easy access. Less common items can occupy higher or lower positions.
Consider weight distribution when planning your layout. Heavier items like paint bottles need sturdy hooks. Lighter supplies work with basic pegboard accessories.
As one teacher shares,
“Visible organization reduces frustration and increases creativity. Students find what they need quickly and get to work.”
Color-code sections for different subjects or activities. Math supplies might live in blue containers. Art materials could occupy red sections. This system makes cleanup intuitive.
Displaying Jewelry and Favorite Trinkets
Turn everyday accessories into decorative elements. Small hooks showcase necklaces without tangling. Mini shelves display special treasures and keepsakes.
This approach keeps favorite items within easy reach. Your daughter can see her entire collection at a glance. Everything stays organized while adding personal charm.
Consider lighting for better visibility. Small LED strips highlight displayed pieces beautifully. Natural light from nearby windows works well too.
Arrange items by color or material for visual appeal. Silver jewelry might occupy one area. Beaded creations could fill another space. This creates an artistic display.
Rotate collections seasonally or as interests change. Summer accessories might give way to winter favorites. The system adapts to evolving tastes effortlessly.
Choosing the Right Pegboard System
Select materials based on your weight requirements. Standard pegboard handles most school supplies and lightweight decor. Reinforced options support heavier items like books or craft machines.
Consider these popular options:
- Standard pegboard: Perfect for school supplies and lightweight accessories
- Metal grid panels: Great for jewelry display and magnetic items
- Custom-sized boards: Ideal for fitting specific wall spaces perfectly
Installation requires proper wall anchors for security. Find studs for heavier loads. Use appropriate hardware for your wall type.
Frame your pegboard for a finished look. Paint the frame to match your room’s color scheme. This integrates the organization system into your decor seamlessly.
Regular maintenance keeps the system effective. Reorganize sections as needs change. Remove unused items to maintain clarity and function.
This flexible approach supports all activities in the space. Your daughter enjoys both practicality and personal expression. The entire area functions better with this smart solution.
8. Implement Stylish and Stackable Bins for Categorized Storage
Those colorful containers can revolutionize how you organize everything. Stackable bins create vertical systems that maximize your available area. They keep belongings sorted while making the most of limited floor space.
Categorized storage transforms chaotic piles into orderly collections. Each category gets its own designated home. This approach prevents forgotten items from getting buried in the mix.
Bright containers turn organization into an engaging activity. Your daughter enjoys sorting her treasures into colorful homes. The process feels more like play than work when using fun designs.
Labeled sections make cleanup incredibly straightforward. Everything has its specific place to return to after use. This system eliminates guesswork during tidying sessions.
These solutions work beautifully for various types of belongings. Toys, accessories, and electronics all organize neatly. The approach adapts to different storage locations throughout the area.
Choosing the Perfect Containers
Select bin sizes based on what needs storing. Smaller items work well in compact containers. Bulkier collections require larger capacity options.
Consider materials that match your storage locations. Plastic bins offer durability for heavy use areas. Fabric options provide flexibility for irregular spaces.
As one organization expert notes,
“The right containers transform chaos into order. They make maintenance effortless while keeping everything accessible.”
Safety matters when selecting stacking systems. Ensure bins interlock securely to prevent tipping. Check weight limits before loading containers fully.
Creating Logical Categories
Group items by how frequently they get used. Daily essentials deserve prime, easy-access locations. Seasonal or occasional items can occupy higher shelves.
Consider your daughter’s natural organizational patterns. She might prefer sorting by color, type, or activity. These intuitive systems encourage consistent use.
Creative labeling makes categories instantly recognizable. Use pictures for younger children who can’t read yet. Color-coded tags work well for visual learners.
| Item Type | Recommended Bin Size | Ideal Location | Stacking Limit |
|---|---|---|---|
| Small toys | 12″ x 12″ | Lower shelves | 4 bins high |
| Art supplies | 14″ x 10″ | Desk area | 3 bins high |
| Electronics | 16″ x 12″ | Charging station | 2 bins high |
| Seasonal clothes | 18″ x 14″ | Closet top shelf | 3 bins high |
| Books | 15″ x 8″ | Reading nook | 5 bins high |
Arrange stacks with safety and accessibility in mind. Heavier containers belong at the bottom of towers. Frequently used items should occupy waist-level positions.
Incorporate bins into your decor through color coordination. Choose hues that complement your existing palette. This integration makes organization part of the room’s design.
Regular reassessment keeps the system effective. Adjust categories as interests and needs evolve. Remove unused items monthly to maintain clarity.
Unconventional uses expand functionality throughout the space. Stackable bins work under beds, in closets, or on shelves. They even create portable organization for shared areas.
This approach maintains order while adapting to changing requirements. Your daughter enjoys both practicality and personal expression. The entire area functions better with this smart solution.
9. Designate Zones with a Rolling Cart for Hobbies and Supplies
Have you ever wished your organization could move with you throughout the day? Rolling carts bring storage to life by traveling wherever needed. These mobile units transform how you use every corner of the room.
They create flexible systems that adapt to changing activities. Your daughter can roll her supplies from desk to bed to floor. This approach makes the most of limited space beautifully.
Designated zones help separate different functions within one area. You might create a reading nook, art station, and dressing area. Each zone gets its own purpose and personality.
Rolling carts serve specific needs perfectly. Art supplies organize neatly in one unit. Homework materials fit another cart beautifully. Beauty products or daily essentials each get their own mobile home.
Choose cart sizes based on intended use. Smaller units work well for compact spaces. Larger options handle bulkier collections of items.
As one designer notes,
“Mobile storage solutions reinvent how we use our spaces. They bring organization to activities rather than waiting for items to return to fixed locations.”
Organize carts with containers and dividers for easy access. Clear bins let you see contents quickly. Labels help maintain order without constant supervision.
Incorporate carts into your design through color choices. Match cart hues to your existing palette. This integration makes mobile storage part of the room’s style.
Safety matters with rolling units. Ensure carts have sturdy wheels and brakes. Check weight capacity before loading heavily.
DIY customization adds personal touches. Paint plain carts with favorite colors. Add decorative knobs or trim for extra charm.
Regular tidying keeps carts organized effectively. Reassess contents monthly as interests change. Remove unused items to maintain clarity.
| Cart Size | Best For | Ideal Location | Weight Capacity |
|---|---|---|---|
| Small (2-tier) | Beauty products | Dressing area | 15 pounds |
| Medium (3-tier) | Art supplies | Creative zone | 25 pounds |
| Large (4-tier) | Homework materials | Study space | 40 pounds |
| Extra Wide | Craft projects | Activity area | 50 pounds |
| Narrow | Reading books | Bedside | 20 pounds |
Mobile storage supports flexible use of space wonderfully. Your daughter can create temporary zones for different activities. The system adapts as her needs evolve over time.
This approach keeps essentials within reach wherever she goes. The entire room functions better with this smart solution. You create both practicality and personality in the space.
10. Transform a Closet into a Cozy Reading Nook or Built-In Bunk Area

Have you considered turning unused closet space into something magical? Many rooms have extra closets that just collect dust. You can convert these areas into functional zones that add charm and practicality.
These transformations create special spots for relaxation or sleepovers. They maximize every inch of available square footage. Your daughter gains a unique area that feels like her own private retreat.
Adding Curtains for a Secret Hideaway Feel
Curtains transform ordinary spaces into enchanting hideaways. They provide privacy and create a sense of mystery. Your girl will love having her own special corner behind flowing fabric.
Choose light, airy materials that allow proper ventilation. Sheer fabrics maintain airflow while adding softness. Heavier options offer more privacy for sleeping areas.
Install curtain rods above the closet opening. Ensure they extend beyond the frame for complete coverage. This creates the illusion of a separate little room.
Add soft lighting inside the nook for cozy ambiance. String lights or small lamps work beautifully. They make the space inviting for reading or relaxing.
As one parent discovered, “The curtains made it feel extra special! She loved that it was like her own little secret hideaway.” This simple addition creates magical moments.
Building Custom Bunks with Integrated Shelves
Built-in bunk beds maximize sleeping space while incorporating smart organization. They work perfectly in deeper closets or alcoves. You create sleeping arrangements for friends during sleepovers.
Measure your closet dimensions carefully before building. Ensure enough headroom for comfortable sitting and moving. Standard closets typically accommodate twin-sized bunks.
Incorporate shelves alongside or beneath the sleeping area. These hold books, lights, or personal items. Everything stays organized within easy reach.
Use sturdy materials and proper construction techniques. Safety rails prevent accidental falls during sleep. Secure ladders provide safe access to upper bunks.
Consider ventilation when enclosing sleeping areas. Leave gaps at the top or add small ventilation panels. This maintains air circulation for comfort.
These conversions free up valuable floor space in the main area. Your daughter gains more room for activities and play. The entire layout functions better with this smart solution.
Regular maintenance keeps converted spaces fresh and functional. Wash curtains seasonally and check all fittings. Adjust the setup as your child’s needs evolve over time.
11. Display and Organize with Hanging Jewelry Holders and Screens
Your favorite accessories deserve to be seen and enjoyed every day. Instead of hiding them away, turn jewelry into beautiful decor. These clever solutions keep everything organized while adding personal charm.
Hanging displays combine function with visual appeal. They transform necklaces and earrings into wall art. You create a system that works beautifully and looks great.
Metal screens offer perfect spots for delicate pieces. Simple frames turn them into decorative elements. Your treasures stay untangled and ready to wear.
Hooks and shelves provide flexible organization. They accommodate different types and sizes of accessories. Everything finds its perfect home.
Place a narrow shelf near your dressing area. This adds surface space for daily essentials. Makeup and frequently worn items stay within easy reach.
Choosing the Right Display System
Consider your collection size and types. Delicate chains need gentle hanging options. Stud earrings require small holes or pads.
Various holders suit different needs perfectly. Here’s how to select the best fit:
| Jewelry Type | Recommended Holder | Installation Type | Capacity |
|---|---|---|---|
| Necklaces | Multi-hook rack | Wall mounted | 15-20 pieces |
| Earrings | Perforated screen | Freestanding | 30-40 pairs |
| Bracelets | Stacking rods | Tabletop | 10-15 pieces |
| Rings | Velvet trays | Drawer insert | 20-25 rings |
| Brooches | Fabric panels | Door mounted | 12-15 pins |
Visible storage makes selection effortless. You see everything at a glance without digging. This saves time during busy mornings.
The approach reduces clutter significantly. Instead of tangled piles, you enjoy organized displays. Your space feels calmer and more intentional.
Creative DIY Options
Repurpose everyday items into unique organizers. An old picture frame becomes a jewelry screen. Add mesh backing for hanging earrings.
Branch displays create natural charm. Secure a interesting branch to your wall. Hang necklaces from its smaller limbs.
As one crafter shares,
“DIY organizers add personal touch while saving money. They turn organization into creative expression.”
Embroidery hoops with fabric make lovely displays. Stretch lace or mesh between the rings. Pin earrings directly to the material.
Ice cube trays work wonderfully in drawers. They separate different types of small items. Everything stays organized and accessible.
Organization and Maintenance Tips
Sort pieces by how often you wear them. Frequently used items deserve prime locations. Special occasion jewelry can occupy less accessible spots.
Color coding creates visual appeal. Group silver pieces together in one area. Gold accessories might occupy another section.
Regular cleaning maintains piece condition. Gently wipe displayed items weekly. This prevents tarnish and keeps everything shining.
Consider security for valuable pieces. Lockable cabinets protect precious items. Insurance documentation stays current.
Rotate collections with seasons or moods. Summer favorites might take center stage. Winter pieces can wait their turn.
Combine different solutions throughout your space. Use wall displays for everyday items. Keep special pieces in protected storage.
This approach keeps your accessories organized and beautiful. You enjoy both practicality and personal expression. The entire system works beautifully for years.
12. Use Labeled Baskets to Give Every Small Item a Home
Do you spend too much time searching for missing treasures? Labeled baskets create instant order from everyday chaos. They transform random piles into neat collections that make sense.
Everything gets its own special spot with this approach. No more lost hair clips or forgotten art supplies. Your space stays tidy because each item knows where to belong.
Bright containers turn cleanup into a fun activity. Your child enjoys matching items to their colorful homes. The system feels more like play than work.
Designated homes prevent clutter from building up. Small things won’t get buried under larger items. You save time during daily routines.
As one parent shared,
“Labeled baskets changed our morning routine completely. Now everything has its place and we never run late searching for missing items.”
Choosing the Right Baskets
Select containers based on what needs storing. Smaller items work well in compact baskets. Bulkier collections require larger options.
Consider materials that match your decor style. Wicker offers natural charm for rustic themes. Fabric bins provide softness for modern spaces.
Clear containers allow quick visibility of contents. You see what’s inside without opening lids. This saves time during busy moments.
Stackable designs maximize vertical space beautifully. They create organized towers on shelves or in closets. Everything stays accessible yet neat.
Creating Effective Labels
Clear identification makes systems intuitive. Your child knows where things belong instantly. This encourages independent tidying habits.
Use pictures for younger children who can’t read yet. Draw simple images of contents on tags. Color-coding works well for visual learners.
Creative labeling adds personal charm to organization. Try these fun ideas:
- Chalkboard tags that can be updated easily
- Embroidered labels for a handmade touch
- Color-coded ribbons tied to basket handles
- Printed photos showing what belongs inside
Place labels at child’s eye level for easy reading. Ensure they’re secure and won’t fall off. Waterproof options work best for long-term use.
Smart Category Systems
Group items by how they get used daily. Frequently used things deserve prime locations. Special occasion items can live higher up.
Consider your child’s natural organizational patterns. She might prefer sorting by color or activity type. These intuitive systems encourage consistent use.
| Item Category | Recommended Basket Size | Ideal Location | Labeling Method |
|---|---|---|---|
| Art supplies | 12″ x 8″ | Desk area | Color picture of paints |
| Hair accessories | 6″ x 6″ | Dressing table | Ribbon color coding |
| Small toys | 10″ x 10″ | Play zone shelf | Photo of contents |
| Electronics | 8″ x 6″ | Charging station | Symbol labels |
| School supplies | 14″ x 10″ | Homework area | Subject names |
Incorporate baskets into existing shelving units. They fit perfectly in cubbies or on open shelves. The combination creates comprehensive organization.
Regular maintenance keeps systems effective. Reassess categories as interests change monthly. Remove unused items to maintain clarity.
This approach reduces stress significantly. Your child enjoys both order and independence. The entire space functions better with everything in its place.
13. The Ultimate List of Stylish Storage Ideas for Girls Bedrooms

Ready to put all these amazing concepts together? This collection brings the best approaches into one easy-to-follow guide. You’ll discover how to combine different methods for maximum impact.
Each solution addresses specific challenges in creative ways. They work together to create a cohesive system. Your girl’s area becomes both beautiful and perfectly organized.
Bedside Caddies and Hanging Organizers
Keep nighttime essentials close without creating mess. A bedside caddy holds books, chargers, and favorite items securely. Everything stays within arm’s reach yet off surfaces.
These clever solutions attach directly to bed frames. They eliminate clutter on nightstands or floors. Your space maintains its neat appearance daily.
Hanging organizers maximize vertical areas wonderfully. They store small things without consuming extra square footage. Doors and walls become active organization zones.
Choose materials that match your decor style. Fabric options add softness to the area. Clear pockets provide visibility for contents.
As one parent noted,
“The caddy changed our bedtime routine completely. No more searching for lost items in the dark.”
Clear Under-Bed Containers for Seasonal Items
See-through boxes revolutionize how you store off-season belongings. You identify contents without opening every container. This saves time during seasonal transitions.
These solutions work perfectly for clothing rotations. Summer outfits store neatly during winter months. Winter wear waits comfortably during warmer seasons.
Choose low-profile designs that slide easily. Measure clearance height before selecting sizes. Proper fit ensures smooth operation.
Label each container for quick identification. Use simple tags describing contents. Color-coding adds visual organization.
Stack containers efficiently to maximize space. Heavier boxes belong at the bottom. Lighter items can occupy higher positions.
Combine different approaches for comprehensive organization. Start with priority zones that cause daily frustration. Address these areas first for immediate impact.
Consider your girl’s specific needs and habits. Custom solutions work better than one-size-fits-all approaches. Personalization creates ownership and pride.
Plan for both current requirements and future growth. Systems should adapt as interests change. Flexible designs prevent frequent overhauls.
Regular maintenance keeps everything working beautifully. Reassess organization monthly. Remove unused items to maintain clarity.
Create a space that supports all activities wonderfully. Your girl enjoys both function and beauty in her special area. The entire environment works harmoniously together.
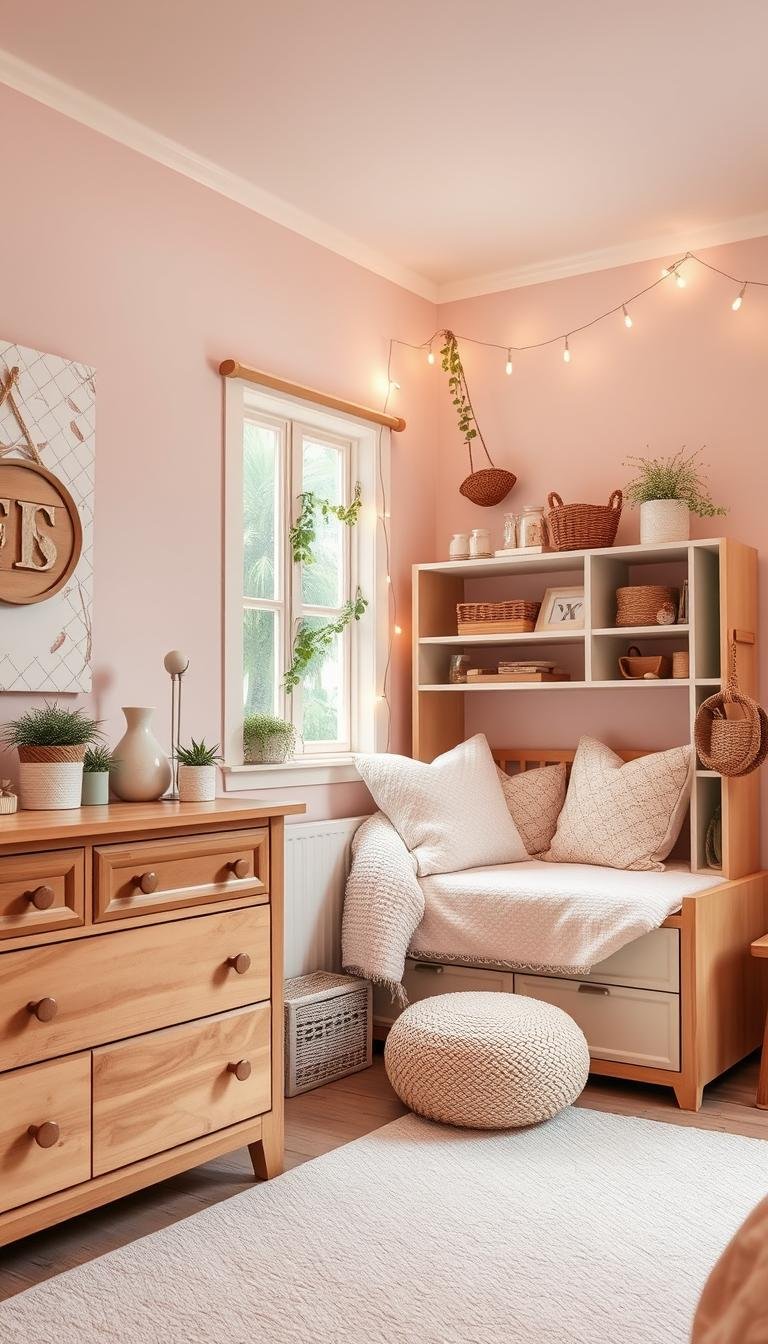
14. Create a Canopy or Reading Nook to Encourage Tidy Relaxation
Imagine transforming a corner into a magical retreat that invites peaceful moments. A dedicated relaxation space encourages your daughter to enjoy quiet activities while keeping her area organized. This special spot becomes a haven for reading, dreaming, and creative thinking.
Designated zones for specific activities naturally reduce overall clutter. When everything has its proper place, tidiness becomes effortless. Your girl learns valuable habits that last throughout her life.
Creating a canopy area feels like building a personal sanctuary. Start by choosing the perfect location in the room. Look for a quiet corner with good natural light or near a window.
Consider the available floor space and how the area will function. The spot should feel separate from the main activity zones. This separation creates that special hideaway feeling kids love.
Canopy designs range from simple to elaborate. A basic frame with flowing fabric creates instant magic. For a more permanent solution, build a structured nook with built-in seating.
As one designer notes,
“A well-designed reading nook becomes the heart of a child’s room. It’s where imagination grows and precious quiet moments happen.”
Incorporate smart storage right into the relaxation area. Small shelves beside the seating hold current reading material. A nearby basket keeps favorite books within easy reach.
Built-in drawers under window seats provide hidden organization. These compartments store extra blankets, pillows, or seasonal items. Everything stays accessible yet out of sight.
Choose textiles that add comfort and personality. Plush cushions make the space inviting for hours of reading. Soft throws add warmth during cooler evenings.
Lighting creates the perfect ambiance for relaxation. String lights add a magical touch to canopy areas. A small reading lamp provides focused light for evening stories.
Comfortable seating is essential for lasting enjoyment. Floor pillows work beautifully for younger children. Older kids might prefer a proper chair or built-in bench.
DIY projects offer creative options at different skill levels. Simple curtain canopies require basic sewing skills. More complex built-in nooks might need woodworking experience.
Maintain the area’s appeal through regular refreshing. Wash cushions and throws seasonally. Rotate book selections to keep the space feeling new and exciting.
Psychological benefits make these spaces worth creating. Dedicated quiet areas reduce stress and improve focus. Your daughter gains a personal retreat within her own room.
The entire room functions better with designated activity zones. Clutter decreases when everything has its proper home. Your girl enjoys both beauty and practicality in her special space.
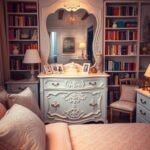
15. Build a Custom Storage Headboard to Eliminate Nightstands
What if your bed could become the ultimate storage solution? Custom headboards transform wasted space into functional organization. They provide bedside access while freeing up valuable floor area.
These innovative designs maximize every inch of your sleeping zone. You gain convenient spots for nighttime essentials without extra furniture. The approach works beautifully in compact rooms where space matters most.
Built-in shelves offer perfect display space for favorite items. Books, photos, and special treasures stay within easy reach. Concealed compartments hide personal belongings out of sight.
Open cubbies work well for frequently used nighttime items. Water bottles, reading glasses, and chargers organize neatly. Closed cabinets store less-used possessions securely.
Eliminating traditional nightstands creates significant benefits. You gain more walking space around the bed area. The room feels larger and less cluttered instantly.
Design your headboard to match specific organizational needs. Consider what items your daughter uses most at bedtime. Create dedicated spots for these essentials first.
Aesthetic preferences guide material and finish choices. Natural wood brings warmth to traditional spaces. Painted surfaces complement modern color schemes beautifully.
As one designer notes,
“Integrated headboard storage solves multiple challenges simultaneously. It provides function while enhancing the room’s overall design.”
Incorporate additional functionalities for maximum convenience. Built-in reading lights eliminate table lamp needs. USB charging ports keep devices powered overnight.
Small shelves can hold alarm clocks or sound machines. These integrations create a complete bedside station. Everything works together seamlessly.
Safety remains paramount with any headboard design. Ensure all installations are securely anchored to the wall. Avoid sharp edges or protruding hardware.
Weight capacity matters for shelving units. Distribute heavier items toward the bottom sections. Use proper wall anchors for stability.
Materials should complement your existing decor style. Match wood tones to other furniture pieces. Coordinate colors with the overall room palette.
These solutions adapt beautifully to changing needs. Younger kids enjoy accessible cubbies for stuffed animals. Teens appreciate discreet spots for personal items.
DIY projects offer creative options at various skill levels. Simple designs might involve adding shelves to an existing headboard. More complex builds could include built-in cabinets.
Consider accessibility when planning your design. Frequently used items should be at arm’s reach from bed. Less-used things can occupy higher or lower positions.
This approach keeps essentials organized yet accessible. Your daughter enjoys both functionality and style. The entire sleeping area works better with this smart solution.
Your Journey to a Clutter-Free, Beautifully Organized Bedroom Starts Now
You now have the tools to create a tidy, personalized space that works for your child. These solutions help keep belongings accessible yet neatly arranged. The right approach makes daily routines smoother and cleanup faster.
Start with one area that needs the most attention. Involve your daughter in choosing what works best for her needs. This teamwork ensures the system lasts and grows with her.
Small changes add up to big transformations over time. An organized room supports better focus and more relaxing moments. It becomes a special retreat she truly enjoys.
Begin today and watch the space evolve into something amazing. Every step brings you closer to a functional, beautiful area that suits your family perfectly.