Imagine stepping into a personal retreat that feels warm and welcoming every evening. Soft, twinkling illumination can completely change how your room feels after dark.
These delicate strands create a cozy atmosphere that lasts through the nighttime hours. They cast a gentle radiance that turns any ordinary area into a special sanctuary.
You can adapt these lighting solutions to match your unique taste and decor style. Whether you prefer modern minimalism or bohemian charm, there’s a perfect option for you.
Creating this dreamy environment offers wonderful emotional benefits too. Your personalized space becomes a calming haven where you can relax and recharge.
We’ll explore numerous creative approaches to help you design the perfect ambiance. From simple installations to more elaborate displays, you’ll discover inspiring concepts that reflect your personality.
Proper arrangement ensures your lights look beautiful while serving practical purposes. These versatile lighting options work wonderfully for both young ones and adults alike.
Get ready to reimagine your personal haven with our friendly, inspirational guide. Let’s create a space that truly glows with character and comfort.
Why Fairy Lights Transform Your Bedroom Into a Magical Sanctuary
Your personal space deserves to be more than just a sleeping area. It should reflect comfort and inspiration. These delicate lighting strands infuse your room with warmth and character.
Soft illumination creates emotional comfort in your personal retreat. The gentle glow helps you unwind after a long day. It turns your space into a calming haven.
Warm lighting impacts relaxation and sleep quality positively. Studies show softer light reduces stress before bedtime. This makes your evenings more peaceful and restorative.
Plain rooms gain personality with these creative lighting solutions. You can express your unique style through various arrangements. The lights add charm to any decor theme.
Different room sizes and layouts work well with versatile lighting options. Small apartments and large bedrooms both benefit equally. You can adapt the installation to your specific space.
Proper placement enhances your overall room ambiance. Strategic positioning highlights favorite areas while creating balance. The effect feels both intentional and naturally inviting.
These lights blend seamlessly with your existing decor elements. They complement rather than compete with your current style. Your space maintains a cohesive, put-together appearance.
Budget-friendly transformations become possible with accessible lighting options. You don’t need expensive renovations to create impact. Small changes deliver significant atmosphere improvements.
Your sanctuary glows with welcoming comfort at any hour. Morning light creates a soft wake-up environment. Evening illumination establishes a relaxing transition to sleep.
| Lighting Benefit | Emotional Impact | Practical Advantage |
|---|---|---|
| Soft glow | Reduces evening stress | Creates reading-friendly light |
| Warm tones | Enhances relaxation | Complements various color schemes |
| Versatile placement | Personalizes your space | Fits any room layout |
| Adjustable brightness | Controls mood setting | Saves energy compared to main lights |
Your personal retreat becomes a true sanctuary through thoughtful lighting. The atmosphere supports both relaxation and self-expression. You create a space that truly feels like your own.
Choosing the Perfect Fairy Lights for Your Bedroom Style

Selecting the right lighting transforms your personal space. Your choice depends on your existing decor and desired atmosphere.
Consider both color options and power sources. These decisions impact functionality and visual appeal.
Coordinating your illumination with room colors creates harmony. The proper string length ensures complete coverage without excess.
Warm White vs. Colorful Fairy Lights
Warm white options create classic elegance. They provide soft, inviting illumination perfect for relaxation.
These neutral tones complement various color schemes. They work well with minimalist and modern designs.
Colorful strands offer playful energy. Multi-color options create festive atmospheres for creative spaces.
Consider your overall room palette when choosing. Match or contrast colors for different effects.
Light temperature affects mood significantly. Warmer tones promote calmness before sleep.
Battery-Operated vs. Plug-In Options
Battery-powered lights offer placement flexibility. You can position them anywhere without outlet limitations.
They’re perfect for temporary installations or rental spaces. No cords mean cleaner-looking arrangements.
Plug-in versions provide consistent power supply. They’re ideal for permanent installations near outlets.
Consider remote controls and timer features. These additions enhance convenience and energy efficiency.
Dimmable options allow adjustable brightness levels. You can customize illumination for different activities.
Measure your space before purchasing strings. Proper length prevents frustrating shortages or excessive coiling.
Different bedroom sizes require varying coverage. Larger rooms might need multiple strands for full effect.
Your personal style guides final selections. Whether romantic, boho, or modern, there’s perfect lighting waiting.
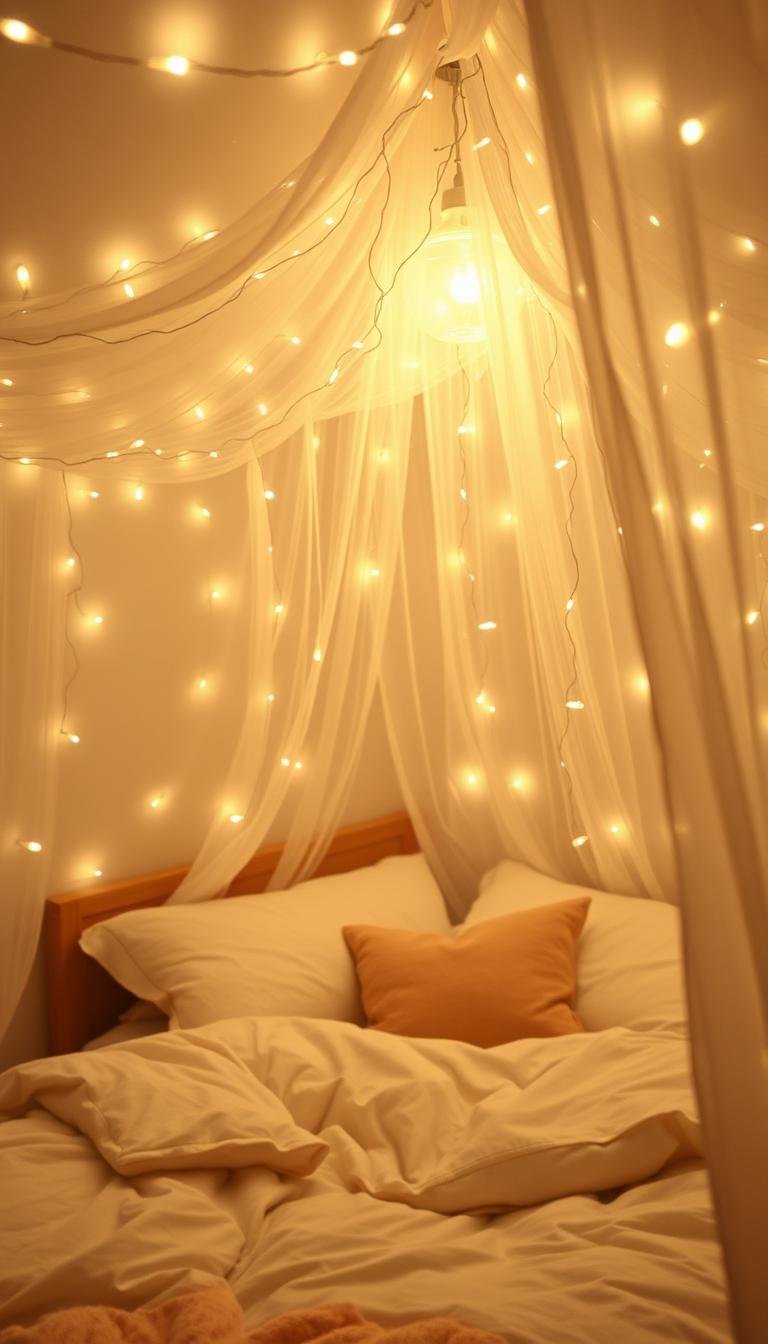
Create a Dreamy Canopy Above Your Bed
Transform your sleeping area into a personal oasis with an overhead glow. A carefully arranged canopy creates romantic ambiance that feels both intimate and expansive.
This lighting technique draws the eye upward while providing soft, diffused illumination. The effect makes your space feel more luxurious and thoughtfully designed.
Your overhead arrangement becomes the room’s stunning focal point. It transforms ordinary ceilings into something special and personalized.
Step-by-Step Guide to Hanging Lights Over Your Bed
Begin by measuring your space carefully. Note the distance from your headboard to the ceiling and across your sleeping area.
Choose your preferred pattern before installation. Popular options include straight lines, gentle waves, or criss-cross designs.
Select the right fairy lights length for complete coverage. Add extra length for cascading effects or decorative draping.
Warm white options work beautifully for canopy arrangements. They create consistent, soothing illumination perfect for relaxation.
Plan your power source location beforehand. Consider battery-operated versions for maximum placement flexibility.
Start installation from the center point above your bed. Work outward symmetrically for balanced visual appeal.
Secure wires gently without pulling too tightly. Maintain natural drape for the most attractive results.
Using Adhesive Hooks for Damage-Free Installation
Adhesive hooks offer perfect solutions for renters or temporary installations. They hold securely while removing cleanly later.
Choose clear command strips for nearly invisible placement. These work well on various ceiling textures and finishes.
Clean the surface thoroughly before applying hooks. This ensures maximum adhesion and security.
Follow package instructions for proper application. Most require pressing firmly for thirty seconds after placement.
Space hooks evenly along your planned pattern. Typically 12-18 inches apart works well for most installations.
Test the adhesion with gentle pressure before hanging lights. Wait the recommended time before adding weight.
For heavier light strings, consider multiple hooks per section. This distributes weight and prevents sagging over time.
Hide wires along ceiling edges or moldings when possible. Use additional hooks to guide cords toward power sources.
Always check safety guidelines for overhead installations. Keep lights away from heating vents and ensure proper airflow.
Complement your canopy with sheer fabric drapes or dream catchers. These additions enhance the magical atmosphere beautifully.
Your finished creation provides stunning visual impact day and night. The soft glow creates perfect reading light and relaxation ambiance.
Frame Your Headboard with Twinkling Starburst Lights

Your sleeping area gains instant personality when you highlight the headboard with sparkling illumination. Starburst-style strings create dramatic visual interest that transforms your entire room.
These special lighting options feature multiple tiny bulbs radiating from central points. They produce beautiful patterns that catch the eye from every angle.
Wrapping lights around your headboard establishes a clear focal point. The technique draws attention to your bed as the room’s centerpiece.
Different headboard materials require specific wrapping approaches. Wood frames work well with gentle weaving between slats or posts.
Metal headboards offer excellent opportunities for creative wrapping. You can follow intricate patterns along scrollwork or frame outlines.
Upholstered headboards need careful attachment methods. Use removable hooks or discreet pins that won’t damage the fabric.
Balance matters when distributing illumination around your frame. Start from the center and work outward symmetrically.
Space bulbs evenly for consistent brightness across the entire headboard. Avoid clustering too many lights in one area.
Starburst designs create beautiful effects both day and night. They look decorative when off and magical when illuminated.
Coordinate your headboard lighting with other room illumination. Consider matching warm white tones throughout your space.
This framing technique complements various design styles. Traditional bedrooms gain romantic charm while modern spaces acquire artistic flair.
| Headboard Type | Wrapping Technique | Special Considerations |
|---|---|---|
| Wood | Weave between slats | Use soft ties to prevent scratches |
| Metal | Follow decorative elements | Ensure no sharp edges damage wires |
| Upholstered | Use removable adhesive hooks | Test adhesion on hidden area first |
| Panel-style | Outline the entire frame | Measure perimeter for proper length |
Secure your lighting safely without damaging surfaces. Choose damage-free hanging solutions that maintain your headboard’s integrity.
Battery-operated options provide flexibility for various bed placements. You won’t need nearby outlets for your beautiful headboard frame.
Your finished creation becomes a stunning feature that enhances nighttime ambiance. The soft glow creates perfect reading light while adding decorative charm.
Illuminate Your Walls with Creative Fairy Light Patterns
Your walls become canvases for creative expression when you add beautiful lighting arrangements. These installations transform plain surfaces into stunning visual features that enhance your entire room.
Strategic placement creates depth and dimension throughout your space. You can highlight architectural details or create entirely new focal points.
Different patterns produce unique emotional responses and visual effects. Some designs make rooms feel larger while others create cozy intimacy.
Your lighting choices should complement your existing decor style. Consider color schemes and furniture arrangements when planning.
Zig-Zag and Cascading Designs
Zig-zag patterns create dynamic energy on your vertical surfaces. They draw the eye across the wall in engaging movements.
This approach works beautifully behind beds or above seating areas. The diagonal lines add visual interest to any room layout.
Start your pattern from the top corner and work downward. Maintain consistent spacing between each angle change.
Cascading designs mimic gentle waterfalls or rainfall effects. They create soft, flowing movements that feel calming and organic.
These arrangements work exceptionally well in meditation spaces or reading corners. The downward flow creates peaceful ambiance.
Use longer light strings for more dramatic cascading effects. Allow extra length for natural draping between attachment points.
Using Curtain Wire for Structured Looks
Curtain wire systems provide excellent support for precise arrangements. They help you create clean, structured patterns that maintain their shape.
These kits typically include tension wires and multiple attachment points. You can customize the layout to fit your specific wall dimensions.
Measure your wall space carefully before installing the wire system. Mark your desired pattern with light pencil marks first.
Secure the wire taut between endpoints before adding your lights. This prevents sagging and ensures professional-looking results.
Weave your lighting strands through the wire guides gently. Avoid pulling too tightly to prevent damage to the bulbs or wiring.
Consider plug-in options for permanent installations near outlets. Battery-operated versions offer flexibility for temporary arrangements.
Different mounting options protect your walls while securing your lights. Choose solutions that match your surface type and decor needs.
Adhesive hooks work well on smooth painted surfaces. They remove cleanly without damaging your wall finish.
Small clear pins work for textured walls or wallpaper. They create nearly invisible attachment points when placed carefully.
Command strips offer excellent solutions for rental spaces. They hold securely while allowing damage-free removal later.
Symmetrical patterns create formal, balanced appearances. They work well in traditional or minimalist decor schemes.
Asymmetrical designs feel more modern and artistic. They allow creative expression and unique personalization.
Combine multiple patterns on different walls for layered effects. Just maintain cohesive color tones throughout your space.
Your wall lighting can highlight artwork or architectural features. Use focused arrangements to draw attention to special elements.
Experiment with different patterns before finalizing your installation. Temporary tape helps visualize how each design will look.
Your illuminated walls become stunning features that transform your room’s atmosphere. They create beautiful ambiance day and night.
Transform Your Mirror into a Glowing Centerpiece
Your mirror becomes something special when you frame it with soft illumination. This simple change turns a functional item into a beautiful decorative feature.
These delicate strands create depth and dimension around your reflective surface. The effect makes your entire room appear larger and more inviting.
Different mirror shapes require unique framing approaches. Rectangular versions work well with clean border outlines. Round mirrors benefit from circular patterns that follow their curves.
Full-length mirrors offer fantastic opportunities for dramatic effects. You can create vertical cascades or elegant side draping.
Your lighting choice impacts the final look significantly. Warm white options provide classic elegance. They create soft, flattering light for grooming tasks.
Colorful strands add playful energy to your space. They work well in creative or eclectic decor schemes.
Consider these attachment methods for various mirror types:
| Mirror Style | Framing Technique | Attachment Solution |
|---|---|---|
| Framed mirror | Follow the frame outline | Small clear adhesive hooks |
| Frameless mirror | Create a border pattern | Removable mounting putty |
| Decorative frame | Highlight ornate details | Thin transparent tape |
| Full-length mirror | Vertical cascading effect | Command strips along edges |
Balance your light distribution for the most attractive results. Space bulbs evenly around the mirror perimeter. Avoid clustering too many in one area.
Your illuminated mirror provides excellent practical benefits too. The soft glow offers perfect lighting for morning routines. It eliminates harsh shadows during grooming activities.
Safety matters when working with electrical components near glass. Keep wires secured away from the mirror’s edge. Use battery-operated options to avoid cord hazards.
Choose lighting colors that complement your mirror frame and room decor. Metallic frames pair beautifully with warm white illumination. Wood frames work well with either white or soft color options.
The reflection amplifies your lighting effect beautifully. It creates the illusion of twice as many lights. Your space feels more expansive and welcoming.
Experiment with different patterns before final installation. Temporary tape helps visualize how each design will look. Step back to view the effect from various angles.
Your transformed mirror becomes a stunning focal point that serves multiple purposes. It combines beauty with functionality in one elegant feature.
Add Warmth to Your Windows with Fairy Light Curtains
Your windows offer beautiful opportunities to enhance your room’s atmosphere. Soft illumination around glass areas creates welcoming transitions between indoor and outdoor spaces.
These delicate strands frame your view with gentle radiance. They make your space feel connected to the outside world while maintaining cozy intimacy.
Window treatments gain new dimension when combined with strategic lighting. The effect adds depth and character to your entire room design.
Layering Lights Behind Sheer Curtains
Sheer fabrics create perfect diffusion for soft illumination. The material gently scatters light throughout your space.
This technique provides privacy while maintaining beautiful visibility. Your room glows with welcoming ambiance day and night.
Choose longer light strings for full coverage across your window. Drape them evenly behind the curtain material.
Battery-operated options work best for this application. You avoid visible cords while maintaining flexible placement.
Consider these attachment methods for different window types:
| Window Style | Installation Approach | Special Considerations |
|---|---|---|
| Standard windows | Vertical cascades | Measure height for proper length |
| Bay windows | Follow architectural curves | Use multiple light strands |
| Skylights | Outline the frame | Ensure secure overhead mounting |
| French doors | Frame the glass panels | Choose weather-resistant options |
Balance your light distribution for consistent brightness. Space bulbs evenly across the entire window area.
Warm white tones add warmth to your morning and evening light. They create flattering illumination that enhances your room’s colors.
Your layered treatment creates beautiful privacy solutions. The soft glow maintains visibility while obscuring clear views inside.
Safety matters when installing electrical components near windows. Keep wires secured away from moving parts. Ensure proper ventilation around lighting elements.
Your window transformation becomes a stunning feature that changes with daylight. Morning sun creates sparkling effects while evening hours offer cozy radiance.
Experiment with different curtain materials and light combinations. Sheer voile works beautifully for soft diffusion. Heavier fabrics create more dramatic framing effects.
Your illuminated windows become focal points that enhance your entire room’s atmosphere. They create beautiful connections between your indoor sanctuary and the outside world.
Create a Cozy Reading Nook with Shelf Lighting

Your favorite books deserve a special place to shine. A well-lit reading corner turns any area into an inviting retreat for quiet moments.
Strategic illumination makes your space feel more welcoming and functional. You can create the perfect atmosphere for enjoying literature.
Bookshelves become more than storage with creative lighting solutions. They transform into beautiful displays that enhance your entire room.
The right arrangement provides both ambiance and practical reading light. Your personal library gains new life after dark.
Weaving Lights Through Books and Decor
Start by selecting the perfect lighting for your shelves. Warm white options work beautifully for reading areas.
They provide clear illumination without harsh glare. These tones create comfortable light for extended reading sessions.
Measure your shelf space before beginning your installation. This ensures you have adequate length for complete coverage.
Weave strands gently between book stacks and decorative items. Create natural curves that follow your collection’s arrangement.
Use these simple techniques for different shelf types:
| Shelf Type | Lighting Approach | Special Tips |
|---|---|---|
| Built-in shelves | Horizontal runs along each shelf | Use adhesive clips at regular intervals |
| Freestanding bookcases | Vertical cascades between shelves | Secure wires to shelf supports |
| Wall-mounted shelves | Outline each shelf’s perimeter | Hide wires along bracket edges |
| Cube organizers | Individual lighting per cube | Create mini displays in each section |
Battery-operated lights offer excellent flexibility for shelf arrangements. You avoid visible cords while maintaining beautiful illumination.
Consider remote-controlled options for easy adjustment. Dimmable features allow perfect light levels for different activities.
Your illuminated shelves become functional art pieces. They showcase your collection while providing practical reading light.
Always prioritize safety when working with electrical components. Keep wires away from paper materials and ensure proper ventilation.
Your reading nook becomes a cherished spot for relaxation and enjoyment. The soft glow creates perfect ambiance for losing yourself in great stories.
Magical Fairy Lights Bedroom Ideas That Glow All Night for Kids’ Rooms
Children’s rooms deserve special attention when designing with gentle illumination. These delicate strands transform ordinary spaces into comforting retreats for young imaginations.
Soft lighting creates safe environments that ease bedtime routines. The gentle radiance provides comfort for children who feel uneasy in complete darkness.
Different age groups benefit from tailored lighting approaches. Toddlers enjoy simple arrangements while older children appreciate more creative displays.
Safety remains the top priority for young ones’ spaces. Choose battery-operated options to eliminate cord hazards. Select cool-to-touch LED bulbs that won’t overheat.
Themed arrangements spark joy and creativity in play areas. Consider these popular concepts for various interests:
- Starry night patterns with celestial-shaped bulbs
- Woodland creatures peeking from behind furniture
- Storybook character motifs along reading nooks
- Alphabet or number patterns for learning corners
Draping strands around bed frames creates comforting borders. This technique defines sleeping areas with soft illumination. Children feel secure within these gently glowing boundaries.
Play tents become extraordinary hideaways with interior lighting. String lights inside create magical retreats for imaginative play. These spaces encourage creativity and independent exploration.
Glittery star-shaped options add special enchantment to any play tent arrangement.
Interactive displays engage children’s curiosity and participation. Consider these engaging ideas:
- Color-changing remote-controlled options
- DIY projects where children help create patterns
- Seasonal themes that change throughout the year
- Educational constellations on ceiling surfaces
Durable materials withstand active play environments. Look for shatterproof bulbs and reinforced wiring. Choose waterproof options for easy cleaning.
Maintenance requires regular adult supervision and checking. Inspect wires monthly for any wear or damage. Teach children proper respect for electrical components.
Your child’s personal space becomes a cherished retreat. The soft glow creates comforting ambiance for both play and rest. These magical environments support happy childhood memories.
Incorporate Fairy Lights into Your Dressing Table Setup

Your vanity area deserves special attention when creating your perfect space. These delicate strands transform ordinary grooming stations into elegant retreats.
Strategic illumination enhances both functionality and aesthetics. Your dressing table becomes a beautiful focal point that serves practical purposes.
Framing your mirror creates flattering light for makeup application. The soft glow eliminates harsh shadows while providing clear visibility.
Outline your table edges with gentle illumination. This technique defines your space with welcoming radiance.
Choosing Dimmable Options for Adjustable Ambiance
Dimmable fairy lights offer perfect control over your atmosphere. You can adjust brightness for different tasks throughout the day.
Morning routines benefit from brighter settings. Evening hours call for softer illumination that helps you unwind.
Remote-controlled options provide convenient adjustment. You can change settings without interrupting your routine.
Consider warm white tones for the most flattering effect. These colors create natural-looking light that complements skin tones.
Silver starburst designs add elegant sparkle to your vanity area. They create beautiful patterns that catch light from every angle.
Twinkling options provide gentle movement and visual interest. The subtle flicker feels both calming and enchanting.
Secure your lighting with damage-free attachment methods. Adhesive hooks work well on most table surfaces.
Removable mounting putty offers temporary solutions. It holds securely while allowing easy repositioning.
Always test adhesion on hidden areas first. This ensures your surface remains undamaged.
Balance your light distribution for consistent illumination. Space bulbs evenly around your mirror and table perimeter.
Avoid clustering too many lights in one area. Even spacing creates the most attractive results.
Different table configurations require unique approaches. Consider these popular styles:
- Freestanding vanities with multiple drawers
- Wall-mounted floating tables for modern spaces
- Vintage dressing tables with ornate mirrors
- Minimalist consoles for small areas
Your illuminated dressing area transitions beautifully throughout the day. Functional morning light becomes relaxing evening ambiance.
Safety matters when working near cosmetics and personal items. Choose cool-to-touch LED bulbs that won’t overheat.
Keep wires secured away from products and liquids. Battery-operated options eliminate cord hazards.
Proper vanity lighting makes morning routines more enjoyable and effective.
Your transformed dressing table becomes a cherished part of your daily ritual. The beautiful setup makes preparing for your day something special.
Use Photo Clip Lights to Display Cherished Memories
Your favorite moments deserve a beautiful showcase that combines light and personal meaning. Photo clip lights transform ordinary walls into glowing galleries of your most precious memories.
These special strings feature built-in clips that hold photographs securely. They create functional illumination while displaying your personal stories.
You can hang fairy lights with clips along any wall space. They work perfectly for creating dedicated memory displays in your room.
Choose warm white bulbs for classic elegance. They provide soft, flattering light that enhances your photographs.
Measure your wall area before selecting your light string. Ensure adequate length for your planned arrangement.
Consider plug-in options for permanent installations near outlets. Battery-operated versions offer placement flexibility.
Start by gathering your favorite photographs and keepsakes. Select images that bring joy and positive memories.
Arrange your clips in balanced patterns along the string. Space them evenly for consistent visual appeal.
Mix photograph sizes for interesting visual texture. Combine vertical and horizontal orientations creatively.
Your display can include various personal items beyond photos. Love letters, postcards, and children’s artwork all work beautifully.
Create thematic arrangements that tell specific stories. Family generations, travel adventures, or special celebrations all make wonderful themes.
Secure your light string using damage-free hanging methods. Adhesive hooks work well on most wall surfaces.
Ensure wires remain tidy and organized. Use additional hooks to guide cords neatly toward power sources.
Rotate your displayed items seasonally or for special occasions. This keeps your memory wall fresh and engaging.
Dust your photographs and lights regularly to maintain clarity. Gently wipe bulbs with a soft, dry cloth.
Your personalized display becomes a cherished focal point in your space. It combines beautiful illumination with meaningful decoration.
These arrangements make wonderful conversation starters when guests visit. They share your personal story through visual storytelling.
Your memory wall glows with warmth and personality every evening. It creates a comforting ambiance that celebrates your life’s special moments.
Add Sparkle to Empty Vases and Bell Jars

Transform simple glassware into stunning decorative accents with strategic lighting placement. Your empty containers become beautiful sources of soft illumination throughout your room.
These delicate strands work wonderfully inside various vessel types. They create enchanting displays that catch the eye from every angle.
Glass containers offer the most dramatic effects when filled with illumination. The transparent material allows complete visibility of the beautiful patterns inside.
Ceramic and opaque vessels create more subtle, diffused lighting. They produce a soft glow that radiates gently through the material.
Choose battery-operated options for maximum placement flexibility. You can position your glowing containers anywhere without outlet limitations.
Consider these popular container styles for different effects:
- Tall cylindrical vases for vertical light columns
- Wide mouth jars for easy access and arrangement
- Bell jars with lids for protected displays
- Geometric containers for modern aesthetic appeal
Arrange your lights loosely inside the container for natural drape. Avoid overpacking to maintain beautiful visibility of individual bulbs.
Secure the battery pack discreetly behind or beneath your display. Use decorative elements like moss or stones to conceal any visible components.
Your illuminated containers become beautiful focal points throughout your space. They add warmth and character to shelves, tables, and nightstands.
Multiple containers create layered lighting effects when grouped together. Vary heights and styles for visual interest and depth.
These displays offer wonderful flexibility for seasonal changes. You can easily rearrange or update your container arrangements.
Always prioritize safety when working with electrical components inside enclosed spaces. Ensure proper ventilation and use cool-to-touch LED options.
Your transformed containers become more than just decorative pieces. They create ambient lighting that enhances your entire room’s atmosphere.
Create a Starry Night Effect with Ceiling-Hung Lights
Your ceiling becomes a personal planetarium when you suspend delicate illumination overhead. These tiny bulbs mimic distant stars twinkling in the evening sky.
Miniature star-shaped options create particularly realistic celestial effects. They cast beautiful patterns that transform your entire room after dark.
Strategic placement makes your space feel expansive and dreamy. The overhead glow draws eyes upward while providing soft ambient light.
Consider these suspension techniques for different ceiling heights:
| Ceiling Type | Installation Approach | Special Tips |
|---|---|---|
| Standard height (8-9 ft) | Direct attachment to ceiling surface | Use clear adhesive hooks for minimal visibility |
| Vaulted ceilings | Cascading strands from highest point | Create graduated lengths for dimensional effect |
| Sloped ceilings | Follow the angle with parallel lines | Secure wires at both high and low points |
| Textured ceilings | Use removable mounting putty | Test adhesion on small area first |
Plan your celestial pattern before beginning installation. Many people enjoy recreating actual constellations or creating their own designs.
Mark your pattern lightly with pencil if working directly on the ceiling. This helps maintain consistent spacing and alignment.
Choose fairy lights with varying bulb intensities for dynamic effects. Some strings offer subtle twinkling patterns that mimic real stars.
Warm white options create the most authentic night sky appearance. They provide soft illumination without colorful distractions.
Coordinate your overhead lighting with other room light sources. Dim other lamps when enjoying your starry display for maximum impact.
Always prioritize safety with overhead electrical installations. Use cool-to-touch LED bulbs that won’t overheat near ceiling surfaces.
Ensure proper ventilation around lighting elements. Keep wires secured away from heating vents and fans.
Your transformed ceiling becomes a breathtaking feature day and night. The subtle sparkle creates peaceful ambiance for relaxation and sleep.
Enhance Your Plants with Weaved Fairy Lights
Your indoor greenery becomes even more enchanting when you add soft illumination. These delicate strands bring new life to your botanical displays.
If you’re looking to create a natural outdoorsy feel, consider ivy vine string lights. These special options feature realistic foliage with built-in illumination.
Remote-controlled versions offer eight different animation settings. The 10-inch vine length works beautifully near potted plants or curtained windows.
Weaving lights through plant foliage creates organic, natural-looking displays. The technique highlights your plants’ beautiful shapes and textures.
Start by selecting plant-safe lighting options. Choose cool-to-touch LED bulbs that won’t damage delicate leaves.
Battery-operated lights provide the safest solution for living plants. They eliminate cord hazards while offering placement flexibility.
Gently weave strands through your plant’s branches and leaves. Follow natural growth patterns for the most attractive results.
For hanging plants, create cascading effects that complement their drooping forms. Let lights trail gracefully alongside trailing vines.
Potted plants benefit from lights wrapped around their containers. This technique frames your plants with soft radiance.
Shelved arrangements gain depth with strategic lighting placement. Highlight specific plants while creating beautiful background illumination.
Choose lighting colors that complement your plant’s natural hues. Warm white tones enhance green foliage beautifully.
Silver or copper wire options blend seamlessly with natural elements. They create subtle enhancement rather than overwhelming contrast.
Layered lighting effects work wonderfully with multiple plants. Vary intensity and placement for dimensional interest.
Highlight specific botanical features like unusual leaf shapes or colorful blooms. Focused illumination draws attention to these special characteristics.
Always prioritize plant health when installing lighting. Avoid wrapping too tightly around stems or new growth.
Check regularly for any signs of stress on your plants. Adjust placement if you notice any negative effects.
Keep electrical components away from water and soil. Use waterproof battery packs for extra protection.
Your illuminated plants become stunning focal points in any room corner. They bring natural beauty and soft light together perfectly.
| Plant Type | Lighting Technique | Special Considerations |
|---|---|---|
| Trailing plants | Follow natural vine patterns | Support longer strands with discreet hooks |
| Potted trees | Weave through branches | Use longer strings for complete coverage |
| Succulents | Outline pot edges | Choose low-heat options near sensitive plants |
| Hanging baskets | Create downward cascades | Ensure secure attachment points |
Your plant lighting creates beautiful organic patterns throughout your space. The natural-looking displays enhance your room’s atmosphere wonderfully.
Safety Tips for Hanging Fairy Lights in Your Bedroom
Creating a beautiful atmosphere should always prioritize safety. Proper installation ensures your space remains both lovely and secure for everyone.
Understanding basic electrical safety prevents potential hazards. You can enjoy your illuminated room with complete peace of mind.
Always choose certified products from reputable manufacturers. Look for safety marks like UL or ETL on packaging.
These certifications guarantee proper electrical standards. They ensure your lighting meets important safety requirements.
Keeping Wires Away from Heat Sources
Identify potential heat sources before installing your lights. Common examples include radiators, heating vents, and lamps.
Maintain at least three feet between wires and heat producers. This prevents overheating and potential damage to insulation.
Never run cords behind radiators or baseboard heaters. The concentrated heat can melt plastic coatings over time.
Avoid placing lights near candles or other open flames. Even battery-operated options need careful placement.
Check your installation periodically for warmth near connections. Feel wires occasionally to ensure they remain cool.
Ensuring Proper Airflow Around Lights
Good ventilation prevents heat buildup around electrical components. Leave space around bulbs and power adapters.
Never cover lights with thick fabrics or insulation materials. Choose breathable materials if draping near your installation.
LED options generate less heat than traditional bulbs. They’re safer choices for enclosed spaces or fabric proximity.
Allow natural air circulation around all electrical parts. Avoid stuffing wires into tight spaces or behind furniture.
Proper wire management prevents tripping hazards and damage. Secure cords along baseboards or behind furniture.
Use cord organizers or adhesive clips to keep wires tidy. This prevents accidental pulling or tangling.
Never run cords under rugs where they can get damaged. Foot traffic wears down insulation over time.
Keep wires away from high-traffic areas in your room. Choose paths that minimize people crossing over them.
Extension cords require special attention for safety. Use only heavy-duty cords rated for your lighting’s wattage.
Never connect multiple extension cords together. Use a single cord of adequate length instead.
Check cords regularly for fraying or damage. Replace immediately if you notice any wear.
Unplug lights when not in use to save energy. This also reduces any potential fire risks.
Different surfaces need appropriate mounting solutions. Drywall works well with adhesive hooks designed for walls.
Wood surfaces can use small nails or picture hooks. Test a small area first to ensure no damage.
For delicate surfaces, use removable mounting putty. It holds securely without leaving residue.
Always follow manufacturer instructions for adhesive products. Proper application ensures secure attachment.
Children and pets need special safety considerations. Keep wires out of reach to prevent chewing or pulling.
Use cord covers for any accessible wiring. These plastic channels protect against curious hands and teeth.
Teach children about electrical safety around lights. Explain why they shouldn’t touch or play with cords.
Choose battery-operated options in children’s spaces. They eliminate shock hazards from accessible cords.
Create a regular maintenance schedule for your lights. Monthly inspections catch potential issues early.
Check all bulbs for proper function. Replace any that flicker or don’t light consistently.
Inspect wires for damage or wear. Pay special attention to connection points and plugs.
Ensure all attachments remain secure over time. Re-adjust any hooks or clips that have loosened.
Know what to do in case of electrical issues. First, unplug the lights immediately if problems occur.
Never attempt to repair damaged wires yourself. Contact the manufacturer for proper replacement.
Keep a fire extinguisher accessible in your home. Ensure everyone knows how to use it properly.
Test smoke detectors regularly throughout your home. Change batteries at least twice yearly.
| Safety Check | Frequency | Action Required |
|---|---|---|
| Wire inspection | Monthly | Look for fraying or damage |
| Bulb function | Monthly | Replace non-working bulbs |
| Attachment security | Quarterly | Re-secure loose hooks |
| Cord placement | After cleaning | Re-position if moved |
| Heat check | After 4 hours use | Feel wires for warmth |
Your beautiful lighting should always enhance safety. Following these guidelines ensures years of enjoyable use.
Proper care maintains both appearance and function. Your room remains a secure and welcoming retreat.
Step-by-Step Guide to Planning Your Fairy Light Layout
Strategic preparation makes your lighting installation smooth and successful. Taking time to plan ensures your final result matches your vision perfectly.
Good planning prevents common frustrations like running short on materials. It also helps you create a cohesive look throughout your space.
Measuring Spaces and Choosing Patterns
Begin by measuring your entire room carefully. Note ceiling height, wall lengths, and furniture placement.
Use a quality tape measure for accurate dimensions. Record measurements in a notebook or digital document.
Consider your room’s architectural features when selecting patterns. Highlight interesting angles or create focal points.
Popular pattern options include:
- Straight lines along walls or ceilings
- Gentle waves for organic movement
- Geometric shapes for modern appeal
- Free-form designs for creative expression
Sketch your ideas on graph paper or use design software. Visualizing helps you spot potential issues before installation.
Calculate the total length of fairy lights needed for each area. Add extra length for draping or pattern complexity.
Most lights come in standard lengths like 10, 20, or 30 feet. Choose sizes that minimize excess while covering your planned area.
Coordinate multiple arrangements throughout your bedroom. Ensure patterns complement rather than compete with each other.
Consider how different lighting elements will work together. Create balance between various areas of your space.
Gather these essential tools before starting your project:
| Measurement Tools | Planning Supplies | Installation Items |
|---|---|---|
| Tape measure | Graph paper | Adhesive hooks |
| Laser measure | Pencils and eraser | Command strips |
| Digital level | Colored markers | Wire organizers |
| Measuring app | Design software | Battery packs |
Plan your power source locations early in the process. Identify available outlets or choose battery-operated options.
Consider how you’ll manage wire visibility and placement. Hide cords along baseboards or behind furniture when possible.
Use removable hooks and adhesive solutions for flexible arrangements. These allow easy changes if you want to update your design later.
When you hang fairy light arrangements, think about future adjustments. Create layouts that can evolve with your changing tastes.
The best layouts balance creativity with practicality, creating beauty that functions perfectly.
Test your planned arrangement with temporary tape before final installation. This helps you visualize the final effect accurately.
Step back frequently to view your layout from different angles. Ensure it looks balanced from all perspectives in your room.
Your careful planning results in a stunning transformation. You create a personalized space that reflects your unique style perfectly.
Bringing Your Magical Bedroom Vision to Life
Your creative journey with decorative lighting transforms ordinary areas into personalized retreats. These delicate strands offer endless possibilities for crafting a space that reflects your unique style.
Start with simple projects like framing a mirror or highlighting shelves. Small successes build confidence for more elaborate arrangements later.
Regular maintenance keeps your displays looking beautiful. Gently dust bulbs and check connections monthly for consistent performance.
Seasonal updates refresh your room’s atmosphere effortlessly. Change patterns or add complementary decorations for different times of year.
Combine multiple techniques for a truly customized environment. Layer overhead glows with accent lighting throughout your space.
Quality products ensure both safety and lasting beauty. Research reputable brands offering durable, well-designed options.
Your lighting can evolve with changing tastes and decor styles. Experiment freely and let your arrangements grow with you.
Now embrace your creativity and begin designing. Your dream room awaits your personal touch and imagination.