Welcome to your ultimate guide for creating a magical personal retreat. We will show you how to transform your space with simple, beautiful ideas.
Discover ways to add warmth and charm to your room. These tips help you design a cozy sanctuary that reflects your unique style.
You will learn easy steps to decorate walls, frames, and other areas. Find safe, versatile options like battery-operated or solar-powered strings.
Let’s begin your journey to a dreamy, inviting haven. Relax and recharge in a space that sparkles day and night.
Why Fairy Lights Are the Perfect Bedroom Upgrade

Your personal space deserves more than just basic functionality. It should be a true retreat that reflects your personality and supports your well-being. These tiny bulbs offer a simple yet powerful way to transform your environment.
Creating a Cozy Sanctuary Beyond Sleep
Your room becomes more than just a place to rest. It transforms into a haven for relaxation and self-expression. The gentle glow creates an atmosphere perfect for reading or meditation.
Soft illumination reduces harsh shadows. This promotes calm after a long day. You can adjust the ambiance to match your mood and activities.
The Versatility of Warm, Soft Lighting
These tiny bulbs work year-round, not just during holidays. They adapt to seasonal changes and personal preferences. Their timeless charm enhances any decor style.
LED options stay cool to the touch. They consume less power for prolonged use. This makes them both practical and beautiful.
From highlighting reading nooks to framing mirrors, the possibilities are endless. You can refresh your look without major renovations. Embrace this simple upgrade to elevate both function and beauty in your space.
Choosing Your Fairy Lights: Styles and Power Options

Your selection process should consider both practical and aesthetic factors. The right choice depends on your room’s layout and your personal style preferences.
Think about where you want to place your illumination and how often you’ll use it. This helps determine whether battery power or direct connection works best for your needs.
Battery-Operated vs. Plug-In: Pros and Cons
Battery-operated strings give you complete placement freedom. You can decorate areas without worrying about outlet locations.
They’re perfect for temporary displays or hard-to-reach spots. Remember that batteries need occasional replacement to maintain brightness.
Plug-in options provide consistent performance without battery concerns. They work wonderfully near sockets for permanent installations.
These are ideal for areas where you want reliable illumination day after day. Just ensure your cords can reach outlets safely.
Popular Types: Starburst, Curtain, Festoon, and Clip Lights
Starburst designs create dramatic focal points with clustered bulbs. They work beautifully above your bed or as statement pieces.
Curtain styles drape vertically for elegant window treatments or accent walls. They add sparkling depth to any room arrangement.
Festoon varieties offer exposed bulbs on simple cables for modern flair. Their minimalist look complements eclectic or industrial decor themes.
Clip versions let you showcase personal photos and cherished mementos. They add that special personal touch to shelves or wall spaces.
LED technology brings energy efficiency and cool operation. These bulbs last longer while keeping your space safe.
Consider warm white tones for cozy atmospheres or colorful options for playful vibes. Measure your space to ensure proper coverage for your vision.
Transforming Your Bed into a Dreamy Focal Point

Your sleeping area can become the heart of your personal space with a few creative touches. These techniques help you craft a stunning centerpiece that radiates comfort and charm.
Focus on your headboard and the area above for maximum impact. This approach turns ordinary rest into an extraordinary experience.
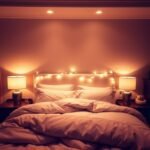
Draping Lights Around the Headboard or Frame
Wrap string lights along your headboard edges for a soft outline. This method highlights its shape while adding a warm glow.
Choose flexible LED strands for easy shaping. They bend smoothly around curves and corners without bulk.
Secure them with damage-free adhesive hooks. These keep everything in place while protecting your furniture.
This setup works wonderfully for kids’ spaces too. It provides gentle illumination that comforts through the night.
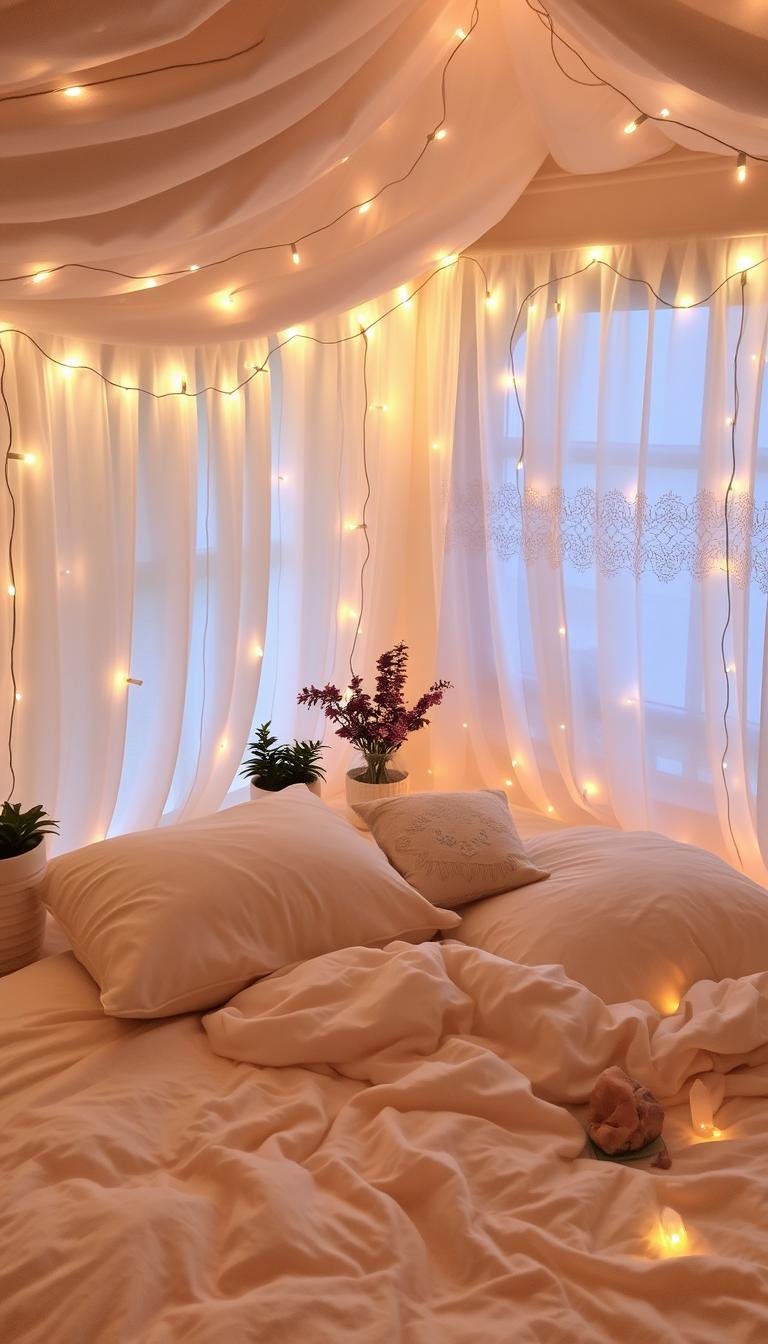
Creating a Canopy Effect Above Your Bed
Hang lights from your ceiling to form a sparkling overhead display. This creates the illusion of a private starlit sky right above you.
Use curtain or festoon styles for structured elegance. Their organized patterns bring a tidy yet magical feel.
Combine with sheer fabric for added softness. The material diffuses the glow into a dreamy haze.
Ensure even distribution to avoid dark patches. Good coverage makes your entire sleeping area feel special.
| Design Approach | Best Light Type | Ideal For | Key Benefit |
|---|---|---|---|
| Headboard Wrapping | Flexible String Lights | All Age Groups | Defines Bed Shape |
| Frame Draping | Warm White LEDs | Children’s Spaces | Nighttime Comfort |
| Structured Canopy | Curtain or Festoon | Elegant Themes | Organized Sparkle |
| Free-Flowing Canopy | Standard Strings | Bohemian Styles | Organic Feel |
| Fabric Combination | All Types | Romantic Ambiance | Softened Glow |
Experiment with different patterns like cascades or zig-zags. Personalize the look to match your room’s character.
This transformation makes your sleeping area multi-functional. Enjoy reading, relaxing, or dreaming under your custom sparkle.
Remember to choose cool-to-touch LED options for safety. They provide beautiful illumination without heat concerns.
Magical Wall Decor Ideas with Fairy Lights

Your walls offer incredible potential for creative expression. Transform blank spaces into captivating features that reflect your personal style.
These techniques bring dimension and personality to any room. They create focal points that draw the eye and spark conversation.
Framing a Mirror for Added Sparkle and Depth
Outline your mirror with delicate fairy lights for instant glamour. This technique turns functional items into stunning decorative elements.
The reflected glow creates beautiful depth throughout your space. It makes small areas feel more open and inviting.
Choose warm white LEDs for a soft, flattering effect. They provide perfect illumination for daily routines.
Use damage-free adhesive hooks for easy installation. This preserves your walls while creating magical accents.
Creating a Boho-Inspired Wall Hanging or Tapestry Accent
Weave string lights through macrame or fabric wall art. This adds texture and creates a handmade Bohemian vibe.
The combination of materials and illumination feels organic and artistic. It brings warmth to minimalist or rustic themes.
Consider a Boho Heart Wall Light as an elegant alternative. It offers ready-made charm with similar Bohemian spirit.
Secure everything with command strips for clean lines. Your display will stay beautiful without wall damage.
Designing a Free-Spirited, Cascading Light Feature
Drape festoon lights in loose vertical patterns from ceiling to floor. This creates movement and whimsical energy in unused corners.
The cascading effect feels spontaneous and artistic. It transforms blank walls into dynamic focal points.
Combine with Pom Pom lights for playful texture. Their soft shapes add comfort and visual interest.
Space bulbs evenly for balanced illumination. Proper securing ensures safety near fabrics and walking areas.
These light ideas adapt to any space size. Scale your project to match your room’s dimensions and desired impact.
Illuminating Your Ceiling for a Starry Night Effect

Look up! Your ceiling holds untapped potential for creating breathtaking atmosphere. This often-overlooked space can become your personal galaxy with simple, creative techniques.
Transform ordinary overhead areas into extraordinary features. These methods add depth and wonder to your entire room.
Creating the Illusion of a Higher Ceiling
Vertical light placement works visual magic. Drape strings from ceiling to floor in room corners.
This draws eyes upward, making spaces feel larger and more open. It’s perfect for rooms with lower overhead clearance.
Use adhesive hooks for damage-free installation. They keep everything secure while preserving your walls.
Choose warm white LEDs for consistent glow. Their cool operation ensures safety near various materials.
DIY Floating Novelty Lights with Balloons
Create whimsical floating orbs with clear balloons and battery-operated strings. This playful project adds temporary magic to any space.
Inflate balloons and carefully insert LED strands inside. Secure them to your ceiling with clear tape or hooks.
The result resembles drifting light clouds or glowing bubbles. It’s perfect for celebrations or children’s spaces.
Always use cool-to-touch options for safety. Their low heat reduces risks near balloon materials.
“The ceiling is the fifth wall of any room – often forgotten but holding incredible transformative power.”
Plan your layout before installation. Measure your space to determine optimal light coverage.
Combine with sheer fabrics for enhanced celestial themes. This creates cohesive, magical atmosphere throughout your room.
Ensure all wires remain neatly managed and hidden. Professional-looking installations prioritize both beauty and safety.
These techniques bring starry magic to your personal space. Enjoy gazing at your own private constellation every night.
How to Decorate Furniture with Fairy Lights
Your furniture pieces offer amazing opportunities for creative lighting. They become functional art when enhanced with soft illumination.
This approach adds depth and personality to your space. It turns ordinary items into extraordinary focal points.
Adding Ambiance to Bookshelves and Reading Nooks
Transform your shelves into cozy displays with gentle lighting. Tuck strings behind books or along edges for hidden glow.
This technique eliminates harsh shadows. It creates perfect reading conditions day or night.
Choose warm white LEDs for comfortable illumination. Their soft light makes pages easy to read without strain.
Battery-operated options work best for flexibility. You can rearrange them as your book collection changes.
Highlighting a Cozy Egg Chair or Seating Area
Make your favorite chair a stunning centerpiece. Wrap delicate strings around its frame for subtle sparkle.
Net lights drape beautifully over curved shapes. They create a uniform glow that highlights unique designs.
This turns simple seating into special retreats. Enjoy reading or relaxing in your personally illuminated spot.
Secure everything with clear adhesive hooks. They keep your display neat while protecting furniture surfaces.
Weaving Lights Through a Bed Palette for a “Floating” Glow
Create magical floating effects with clever placement. Thread strings through gaps in your bed base.
The light emits upward through openings. It gives your sleeping area an ethereal, weightless appearance.
Hidden installation keeps the look clean and intentional. Choose cool-to-touch LEDs for safety near bedding.
This innovative technique adds dimension to your room. It transforms functional furniture into decorative statements.
Creative DIY Fairy Light Projects for Your Room
Ready to roll up your sleeves? These hands-on projects let you create personalized decorations that reflect your unique style. You’ll transform simple materials into stunning focal points.
Each project combines creativity with functionality. They add warmth and personality to your space.
Crafting a Twisted Rope and Light Centerpiece
Combine nautical rope with LED fairy lights for rustic charm. This project creates a beautiful bedside accent.
Wind your string lights around the rope in a spiral pattern. Use discreet ties to secure them in place.
Place your creation in a glass jar or decorative bowl. The result is a charming illuminated piece that glows softly.
This centerpiece works well on nightstands or shelves. It adds coastal vibes to any decor style.
Building a Branch Chandelier or Bedside Lamp Alternative
Bring nature indoors with this organic lighting solution. Select dried branches and coat them for durability.
Wrap fairy lights around the branches to create a natural chandelier. Hang it above your sleeping area or in a corner.
This project adds texture and earthy elegance to your space. It becomes a unique focal point that blends indoors with outdoors.
Choose warm white LEDs for a soft, natural glow. They complement the organic materials beautifully.
Designing a Photo Clip Display with Integrated Lighting
Create a glowing memory wall that showcases cherished moments. Integrate fairy light strings with clips on jute rope or a frame.
This display turns your personal photos into an illuminated gallery. It adds sentimental warmth to your room.
Use hot glue or adhesive hooks to attach clips and lights securely. This ensures your memories stay highlighted and protected.
The result is a personalized feature that glows softly day and night. It’s perfect for adding emotional value to your space.
“The best DIY projects combine personal meaning with beautiful function – creating pieces that tell your story while enhancing your space.”
These light ideas offer several advantages:
- Customizable to match your preferred aesthetic – boho, rustic, or modern
- Cost-effective alternatives to store-bought decorations
- Eco-friendly creativity through material repurposing
- Scalable to fit any room size or layout
Always prioritize safety when working with electrical components. Use cool-to-touch LED options and keep them away from flammable materials.
Your finished projects will become conversation starters and cherished additions. They transform ordinary items into extraordinary personal statements.
Step-by-Step: How to Hang Fairy Lights Safely and Securely
Getting your installation right makes all the difference between a messy look and a magazine-worthy display. These professional techniques ensure your setup stays beautiful and secure for years.
You will learn simple methods to achieve clean lines and perfect placement. Proper hanging keeps your space safe while maximizing visual impact.
Planning Your Layout and Measuring Your Space
Begin by measuring your target area carefully. Use a tape measure to note exact dimensions for walls, ceilings, or furniture.
Sketch a rough design on paper first. This helps visualize patterns like zig-zags or cascades before installation.
Use masking tape to mark your planned path temporarily. This allows adjustments without committing to permanent placement.
Calculate the total length needed for your project. Add extra length for natural draping and connection points.
Using Damage-Free Adhesive Hooks and Command Strips
Select high-quality adhesive hooks designed for lightweight decorations. They hold strands securely without damaging surfaces.
These solutions work perfectly for renters or frequent decor changes. You can remove them cleanly whenever desired.
Press each hook firmly for thirty seconds after placement. This ensures strong adhesion before adding weight.
Space hooks evenly along your planned path. Consistent spacing prevents sagging and maintains tension.
Securing Wires and Ensuring a Clean, Taut Look
Thread wires through hooks carefully to maintain straight lines. Avoid overstretching to prevent damage to internal wiring.
Use small plastic clips for additional security on smooth surfaces. They keep everything neatly in place without visible hardware.
For structured designs like window frames, consider curtain wire kits. They provide professional-looking results with minimal effort.
Tuck excess wiring behind furniture or along edges. Hidden cords maintain the magical illusion of floating illumination.
| Installation Type | Best Hardware | Ideal Pattern | Key Consideration |
|---|---|---|---|
| Wall Mounting | Adhesive Hooks | Zig-Zag | Surface Compatibility |
| Ceiling Draping | Command Strips | Cascade | Weight Distribution |
| Furniture Accent | Plastic Clips | Outline | Material Safety |
| Structured Design | Curtain Wire Kits | Grid | Pattern Precision |
| Temporary Display | Removable Hooks | Free Form | Easy Removal |
Always test your illumination before finalizing installation. Check all bulbs function properly and power sources remain accessible.
Make minor adjustments as needed for perfect alignment. Step back occasionally to view your progress from different angles.
Regularly inspect your setup for stability, especially in active areas. Tighten any loose connections to maintain safety and appearance.
Your careful installation creates a stunning feature that enhances your space beautifully. Enjoy professional-looking results that last.
Essential Safety Tips for Your Fairy Lights Bedroom
Creating a dreamy space should always prioritize your well-being. Smart safety practices ensure your magical decor remains beautiful and risk-free.
These guidelines help you enjoy your illuminated sanctuary with complete peace of mind. They cover everything from bulb selection to overnight operation.
Understanding LED Safety and Heat Considerations
LED fairy lights remain cool during operation. This makes them perfect for near fabrics and bedding.
Their low energy consumption prevents overheating issues. You can enjoy prolonged use without safety concerns.
Always check for proper certification before purchase. Quality LED options meet strict safety standards.
Keeping Wires Away from Fabrics and Heat Sources
Maintain distance between wires and flammable materials. Avoid direct contact with curtains or bedding.
Keep illumination away from radiators or heaters. Heat sources can damage wiring and create hazards.
Ensure proper airflow around all components. Never bundle strings tightly or cover them with fabric.
Best Practices for Leaving Lights On Overnight
Choose LED fairy lights with timer functions. They automatically turn off after set periods.
This practice conserves energy while providing soothing ambiance. It also extends your string lights lifespan.
Regularly inspect all components for damage. Replace frayed wires or loose bulbs immediately.
“Safety isn’t expensive—it’s priceless. Proper installation ensures your magical space remains both beautiful and secure for years.”
Follow manufacturer guidelines for maximum usage hours. Never overload circuits or use incompatible adapters.
Educate household members about proper interaction. Discourage touching or playing with installed illumination.
These practices create a worry-free environment. Your bedroom becomes a truly enchanting retreat.
Bringing Your Magical Bedroom Vision to Life
Your journey to a dreamy, personalized retreat starts with simple steps. These tiny bulbs transform your space into a cozy sanctuary that reflects your unique style.
Begin with small projects like framing a mirror or draping strings on a headboard. Gradually expand to more complex designs as your confidence grows.
Choose the right illumination for your needs. Battery-operated options offer flexibility while plug-in versions provide reliability.
Always prioritize safety with cool-to-touch LED choices and secure mounting. This ensures your beautiful setup remains worry-free.
Draw inspiration from canopy effects or DIY chandeliers. Trusted brands like Sparkle Lighting offer quality options for every style.
Remember: these decorations are both beautiful and functional. They enhance ambiance, mood, and even make your room feel larger.
Share your creations with fellow enthusiasts for advice and inspiration. Your dream space awaits – start planning your layout today!
With this guide, you can create a magical retreat that sparkles day and night. Every moment becomes more enchanting in your transformed sanctuary.