Welcome to your ultimate guide for transforming your personal sanctuary into a stunning retreat that reflects your unique style. This journey combines thoughtful planning with creative expression to build a space you’ll adore.
Achieving that dream look involves careful attention to detail. From defining your vision to selecting final touches, every step matters for a cohesive result.
Whether you love minimalist simplicity or boho charm, this guide offers practical tips. You’ll learn about budgeting, color schemes, lighting, and furniture arrangement.
Follow along to avoid common mistakes and build a room that feels both intentional and Instagram-ready. Your perfect retreat awaits!
Finding Your Bedroom Inspiration and Defining Your Style
Your personal space should reflect who you are. A clear vision makes decorating easier and more fun. It helps you build a room that feels truly yours.
How to Curate an Effective Pinterest Board
Start by saving images that catch your eye. Look for common colors, textures, and layouts. Group similar pins into boards for each theme.
This process reveals patterns in your taste. You might notice a love for soft lighting or natural materials. These details guide your choices later.
Identifying Your Core Aesthetic: Minimalist, Boho, Maximalist, and More
Popular styles include minimalist, boho, and maximalist. Minimalist focuses on clean lines and neutral tones. Boho embraces layered textures and earthy elements.
Maximalist loves bold patterns and vibrant colors. Your true aesthetic might blend several styles. The goal is a space that feels authentic to you.
Looking Beyond Pinterest: Instagram, TikTok, and Decor Blogs
Other platforms offer fresh ideas. Instagram Reels and TikTok videos show real-life setups. Blogs like Roomtery provide trusted advice.
Note specific details like furniture styles or lighting. These sources often share DIY tips and unique touches. They help you gather diverse inspiration.
Create a mood board to visualize your ideas. This ensures all elements work together harmoniously. Understanding your preferences early avoids disjointed results.
A well-defined style serves as your foundation. It makes budgeting and shopping smoother. Your space will feel both intentional and inviting.
Planning Your Bedroom Makeover: A Step-by-Step Approach
Strategic preparation ensures your makeover stays on track and within budget. This phase turns inspiration into actionable steps that create cohesive results.
Setting a Realistic Budget for Your Project
Start by listing must-have items like quality bedding or lighting. Essentials come first in your spending plan.
Always reserve 10-15% for unexpected expenses. This cushion prevents stress when surprises occur.
Track everything using budgeting apps or simple spreadsheets. Seeing numbers visually helps maintain financial control.
Creating a Mood Board and Sourcing Ideas
Collect images that reflect your desired atmosphere. Digital tools like Canva work beautifully for this.
Compare textures and colors side-by-side. This visual confirmation prevents clashing elements later.
Explore affordable sources for unique pieces. Thrift stores and online marketplaces offer character-rich finds.
DIY projects add personal touches without high costs. Simple crafts often make the most meaningful decor.
Making a Shopping List and Timeline
Organize your list by priority and cost. Big-ticket items come first, followed by accessories.
Include everything from paint supplies to final decor pieces. Comprehensive lists prevent multiple store trips.
Break your timeline into manageable phases:
- Preparation: painting, cleaning
- Installation: furniture assembly
- Styling: decor placement
This approach transforms overwhelming projects into achievable steps. Your space evolves systematically toward completion.
Thorough planning makes the process enjoyable rather than stressful. You’ll create a personally meaningful environment that reflects your vision perfectly.
Choosing a Color Palette That Sets the Right Mood
Your choice of hues creates the foundation for a space that reflects your personality and promotes well-being. Colors influence how you feel every time you enter your personal sanctuary.
The right palette transforms ordinary walls into an intentional environment. It sets the tone before you even add furniture or accessories.
The Psychology of Color in Bedroom Design
Different shades evoke specific emotional responses. Cool tones like blues and greens promote calmness and relaxation.
These are perfect for creating a serene retreat. Warm colors like peach or yellow add energy and coziness.
They make spaces feel inviting and comfortable. Understanding this psychology helps you design with intention.
Your color choices directly impact your daily mood and sleep quality.
Popular Aesthetic Color Schemes: Soft Pastels, Earthy Tones, and Bold Accents
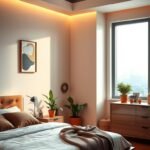
Current trends offer beautiful options for every taste. Soft pastels like blush pink and lavender create dreamy vibes.
They work well for light, airy spaces. Earthy tones including sage green and terracotta bring nature indoors.
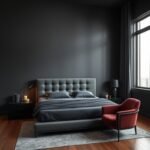
These muted browns and greens create relaxing environments. Bold accents in navy or emerald add dramatic contrast.
| Color Scheme | Best For | Mood Created | Lighting Needs |
|---|---|---|---|
| Soft Pastels | Small spaces, north-facing rooms | Dreamy, peaceful | Amplifies natural light |
| Earthy Tones | Medium to large rooms | Natural, grounded | Works with most lighting |
| Bold Accents | Feature walls, large spaces | Dramatic, sophisticated | Requires good illumination |
| Monochromatic | Any room size | Coherent, classy | Flexible with lighting |
Mixing these schemes creates personalized combinations. A monochromatic approach ensures everything works together harmoniously.
How to Test Paint Colors in Your Lighting Before Committing
Natural and artificial light dramatically changes how colors appear. Morning sun makes shades look different than evening lamplight.
Always test samples on your actual walls. Use sample pots or peel-and-stick swatches for easy testing.
Observe them at different times throughout the day. This prevents costly mistakes and disappointment.
Coordinate your palette with existing furniture and decor. Color wheels or apps help find complementary shades.
Consider your room’s size and light exposure. Darker colors make small spaces cozy but need more lighting.
Lighter tones amplify space and brightness. Textures and patterns in similar color families add depth.
Accent walls or colorful decor pieces introduce bold hues without overwhelming. This allows for flexibility and easy updates.
Choose colors that personally resonate with you. The right palette creates both stylish and comforting environments.
The Ultimate Guide to Pinterest-Worthy Lighting

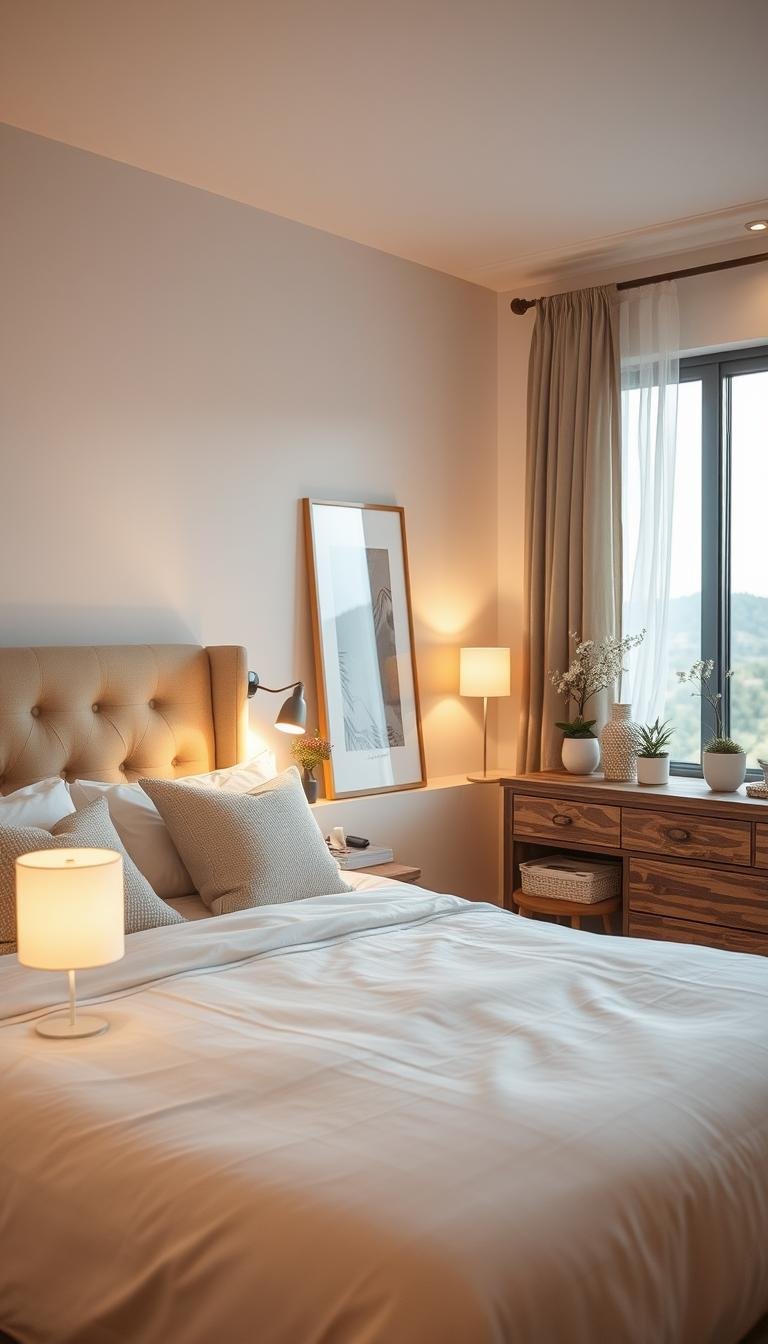
Proper illumination transforms any room from functional to magical. It sets the mood and enhances every design element you’ve carefully chosen.
Strategic lighting creates depth and dimension. It makes your personal retreat feel both cozy and photogenic.
Laying the Foundation: Ambient, Task, and Accent Lighting
Think of lighting in three layers for best results. Ambient light provides general illumination throughout the space.
This includes ceiling fixtures or natural sunlight. Task lighting focuses on specific activities like reading or working.
Bedside lamps and desk lamps serve this purpose well. Accent lighting highlights decorative features or architectural details.
Combining these layers creates a balanced and functional setup. It eliminates dark corners while adding visual interest.
Incorporating Trendy Lights: Fairy Lights and LED Strips
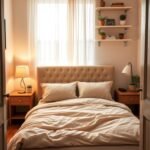
Fairy lights add a whimsical touch to any setup. Drape them over headboards or frame mirrors for soft glow.
LED strips offer modern customization options. Place them under beds or along walls for ambient illumination.
Both options are affordable and easy to install. They provide high impact without breaking your budget.
Use them to define zones or highlight favorite decor pieces. These trendy elements instantly elevate your room’s vibe.
Choosing the Right Bulbs: Warm vs. Cool Tones for Ambiance
Bulb temperature dramatically affects your room’s atmosphere. Warm tones (2700K-3000K) create cozy, inviting spaces.
They work well for relaxation and winding down. Cool tones (3500K-5000K) provide crisp, energetic illumination.
These are better for task-oriented areas. Match your bulb choice to your desired aesthetic and activities.
Consider dimmable options or smart bulbs. They allow easy adjustment throughout the day.
Test different bulbs in your actual space. Lighting looks different at various times and in photos.
Position lights to avoid harsh shadows. Place lamps opposite mirrors or use indirect lighting behind furniture.
This creates soft, diffused effects that photograph beautifully. Your phone camera can help test setups before finalizing.
Well-planned illumination transforms ordinary rooms into extraordinary spaces. It enhances both beauty and comfort in your personal retreat.
Arranging Your Furniture for Function and Flow
Smart furniture placement transforms how you experience and enjoy your personal retreat. It balances beauty with everyday practicality.
The right layout makes movement effortless. It also creates visual harmony throughout the space.
The “Float Your Furniture” Rule for a Dynamic Layout
Pull pieces slightly away from walls. Even a few inches creates better flow.
This technique makes the area feel more open. It adds visual interest too.
Try positioning your bed diagonally or centered. This works especially well in smaller rooms.
Floating furniture creates intentional spacing between pieces. It prevents that cramped, pushed-against-the-wall look.
Selecting Multi-Functional Pieces for Style and Storage
Choose items that serve multiple purposes. Storage beds hide extra linens or seasonal clothing.
Ottomans with hidden compartments offer seating and organization. Desks with shelves keep work supplies tidy.
Nightstands with drawers display favorite things while hiding clutter. These smart choices maximize every inch.
Multi-functional furniture maintains clean lines. It provides utility without sacrificing style.
Creating Designated Zones: Sleeping, Reading, and Getting Ready
Divide your room into purposeful areas. The sleeping zone centers around your bed.
A reading nook needs a comfortable chair and good lighting. Place it near natural light sources.
Create a getting-ready area with a vanity or mirror. Position it near outlets for convenience.
Use rugs to anchor each zone visually. This defines spaces while adding texture.
Consider these tips for optimal placement:
- Measure everything before arranging
- Ensure easy movement between areas
- Position furniture near natural light sources
- Keep bedside tables near outlets
Thoughtful arrangement enhances both function and beauty. Your space becomes more efficient for daily routines.
It maintains that curated aesthetic you love. The final result feels both practical and inviting.
Transforming Your Walls from Flat to Fabulous

Your vertical surfaces hold incredible potential for elevating your entire space. Thoughtful wall treatments add personality and dimension that make your environment feel complete.
Strategic choices turn blank areas into engaging features. They provide visual interest while reflecting your unique taste.
Creating a Stunning Accent Wall
An accent wall adds instant drama without overwhelming the room. Choose one surface to highlight with bold color or texture.
Consider these popular options:
- Peel-and-stick wallpaper with striking patterns
- Wood slats or beadboard for natural texture
- Deep paint colors that complement your palette
Position your accent wall behind the bed or opposite the entrance. This creates a natural focal point that draws the eye.
Test samples in your actual lighting before committing. Colors and patterns change throughout the day.
Styling a Cohesive Gallery Wall
Gallery walls tell your personal story through art and photography. Start by selecting a unifying theme like botanical prints or black-and-white images.
Mix frame sizes and styles for visual interest. Lay everything on the floor first to perfect your arrangement.
Use paper templates to mark nail positions before hanging. This prevents unnecessary holes and ensures proper spacing.
Include three-dimensional objects like small shelves or decorative plates. These elements add depth to your display.
| Gallery Wall Type | Best For | Arrangement Style | Spacing Recommendation |
|---|---|---|---|
| Symmetrical Grid | Modern spaces | Even rows and columns | 2-3 inches between frames |
| Organic Cluster | Eclectic rooms | Asymmetrical grouping | 1-2 inches between pieces |
| Linear Display | Minimalist areas | Single horizontal line | Equal spacing throughout |
| Mixed Media | Personal spaces | Combination approach | Varies by element size |
Your gallery should reflect interests and memories. Rotate pieces seasonally to keep the look fresh.
Using Mirrors and Wall Shelves to Add Depth and Interest
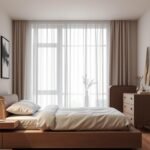
Mirrors amplify light and create the illusion of more space. Position them opposite windows to bounce natural light around the room.
Choose frames that complement your decor style. Ornate gold frames work for traditional spaces while sleek metal suits modern environments.
Wall shelves provide both display space and storage. Floating wood shelves offer a clean, contemporary look.
Style shelves with items of varying heights and textures. Include plants, books, and personal mementos for character.
Keep arrangements balanced but not overcrowded. Leave some negative space to prevent a cluttered appearance.
These wall solutions add functionality while enhancing your aesthetic. They transform plain surfaces into engaging design elements.
Well-designed walls complete your space with personality and purpose. They turn ordinary rooms into extraordinary environments.
Don’t Ignore the Floor: Rugs and Flooring Ideas
Your floor serves as the foundation that ties everything together. It deserves as much attention as your walls and furniture.
Thoughtful floor treatments add comfort underfoot and visual appeal. They complete your space with warmth and personality.
Choosing the Right Size Rug for Your Space
Proper sizing makes all the difference in your room’s vibe. A rug that’s too small can make things feel disconnected.
For beds, ensure the rug extends 18-24 inches on all sides. This creates a balanced look and comfortable landing space.
Always measure your area before shopping. Consider furniture placement and walking paths.
Use painter’s tape to mark potential rug dimensions on your floor. This visual guide helps you choose the perfect fit.
How Vintage and Textured Rugs Add Warmth
Vintage rugs bring character with their unique patterns and colors. They often feature intricate designs that tell a story.
Textured options like shag or wool provide tactile comfort. They also help absorb sound for a quieter environment.
These rugs work beautifully with various decor styles. They add depth and interest to your overall look.
Pair them with your existing color palette. Choose complementary rather than matching tones.
Creative Floor Seating with Cushions and Poufs
Floor seating offers flexible options for relaxing or entertaining. Large cushions and poufs create casual gathering spots.
They’re perfect for small spaces where traditional furniture might not fit. You can easily move or store them when not needed.
Add throws and pillows that match your decor theme. This makes your seating area inviting and cohesive.
Consider these arrangement tips:
- Group cushions in corners for reading nooks
- Use poufs as extra seating or footrests
- Create a dedicated meditation or yoga space
Floor seating brings a relaxed, bohemian vibe to your room. It encourages casual comfort and social connection.
Complete your floor plan with practical touches. Use decorative baskets to hide essentials and keep cables tidy.
Add a rug pad for safety and extra cushioning. This prevents slipping and extends your rug’s life.
Your finished floor design should feel both stylish and functional. It creates the final layer that makes your space feel complete.
Building a Layered and Inviting Bed

Your bed is the heart of your room. It deserves special attention to make it both comfortable and beautiful. A well-styled bed creates a cozy vibe that invites relaxation.
Layering is the key to achieving that luxurious look. It combines practical comfort with visual appeal. Follow these simple steps to transform your sleeping area.
The Insider Secret: Doubling Your Duvet Insert
Professional designers use a clever trick for extra plushness. Place two duvet inserts inside one cover. This creates a full, hotel-style bed instantly.
The double filling adds volume without bulkiness. Your bedding looks inviting and feels incredibly comfortable. This simple change makes a big difference.
Choose inserts that match your climate needs. Lighter options work for warmer areas. Heavier fills provide extra warmth in cooler spaces.
Mixing Textures with Throws, Blankets, and Pillows
Texture adds depth and interest to your bed setup. Combine different materials for a rich feel. Try chunky knits, smooth linens, or soft velvet.
Start with your basic sheets and duvet. Then add a textured throw blanket at the foot. Fold it neatly or drape it casually.
Use pillows in various fabrics too. Mix standard sleeping pillows with decorative ones. Keep the overall look balanced and intentional.
Consider these popular texture combinations:
- Wool throw with linen pillowcases
- Faux fur blanket with cotton quilt
- Knit accent pillow with silk shams
Achieving the Perfect Pillow Arrangement
Pillows should be both functional and decorative. Arrange them in layers for the best look. Start with your sleeping pillows against the headboard.
Add two to four throw pillows in front. Choose sizes that complement each other. Standard squares with smaller lumbar pillows work well.
Keep colors coordinated with your room’s palette. Use pillows to introduce accent colors. They can tie different elements together beautifully.
Steam your bedding before final styling. This removes wrinkles for a crisp appearance. Your bed will look photogenic and well cared for.
A perfectly arranged bed becomes the room’s focal point. It offers visual impact and ultimate comfort for restful sleep.
Styling Surfaces and Shelves Like a Pro
Well-styled surfaces transform ordinary spaces into curated environments. They add personality while keeping your area organized and intentional.
Thoughtful arrangements make every surface tell a story. They create visual interest that catches the eye and feels inviting.
The Rule of Three: Grouping Decor Items Effectively
Odd numbers create natural balance in design. Group three or five pieces together for visual harmony.
This technique prevents arrangements from feeling static. It adds rhythm and movement to your displays.
Choose items that share a common theme or color. They should work together while each bringing something unique.
Odd-number groupings feel more dynamic and intentional. They create focal points that draw attention beautifully.
Mixing Heights and Textures for Visual Balance
Varying heights adds dimension to your arrangements. Combine tall vases, medium books, and small trinkets.
Different textures provide tactile interest too. Mix glossy ceramics with rough wood or soft fabrics.
This approach prevents flat, boring displays. It creates depth that makes your space feel richer.
Consider this height combination guide:
| Height Category | Example Items | Placement Tip | Visual Impact |
|---|---|---|---|
| Tall (12″+ | Floor vases, tall candles | Place at back or center | Creates vertical interest |
| Medium (6-12″) | Stacked books, medium sculptures | Use as transitional pieces | Adds mid-level balance |
| Short (under 6″) | Small trinkets, jewelry dishes | Place in front or on trays | Provides detail and finish |
Always step back to check your balance. Adjust pieces until the arrangement feels cohesive and intentional.
Incorporating Personal Touches: Books, Photos, and Keepsakes
Personal items make your space truly yours. Display favorite books that reflect your interests.
Framed photos add warmth and memories. Choose images that bring joy and positive energy.
Travel souvenirs or family heirlooms tell your story. They create conversation starters and emotional connections.
Use trays or baskets to corral smaller items. This reduces clutter while keeping special things accessible.
Rotate your displays with seasons or moods. This keeps your space feeling fresh and current.
Your most meaningful pieces deserve prominent placement. They transform generic decor into personal sanctuary.
Leave breathing room between groupings. Negative space allows each item to shine without competition.
Well-styled surfaces photograph beautifully for social media. They show thoughtful curation and personal style.
These techniques turn functional areas into decorative highlights. Your room gains depth and character throughout.
Incorporating Texture for a Multi-Dimensional Look

Texture brings depth and personality to your personal area. It makes surfaces interesting to both see and touch. Without varied materials, spaces can feel flat and lack character.
Mixing different textures creates a rich, inviting atmosphere. It adds shadows and highlights that catch the eye. Your space gains a curated, professional vibe that photographs beautifully.
Why Skipping Texture Makes Everything Look Flat
Ignoring texture results in a one-dimensional appearance. Smooth surfaces alone lack visual interest and warmth. They fail to create the cozy feeling you want.
Varied materials add depth and tactile quality. They make your decor feel more intentional and complete. Even small textural changes prevent a sterile look.
Texture introduces subtle shadows and dimension. This makes your entire setup more dynamic. Photos appear more professional with these natural highlights.
Textile Ideas: Knits, Velvet, Wool, and Woven Baskets
Introduce cozy fabrics for instant warmth and comfort. Knit throws add softness to chairs and beds. They invite relaxation with their comfortable feel.
Velvet pillows bring luxury and richness to seating areas. Their smooth nap catches light differently throughout the day. Wool rugs provide warmth underfoot and reduce noise.
Woven baskets offer storage with natural texture. They keep things organized while adding visual interest. These elements work together to build a layered environment.
| Texture Type | Best Placement | Visual Effect | Maintenance Level |
|---|---|---|---|
| Knit Throws | Bed foot, chairs | Cozy, informal | Machine washable |
| Velvet Pillows | Bed, seating | Luxurious, rich | Spot clean |
| Wool Rugs | Floor centers | Warm, sound-absorbing | Professional clean |
| Woven Baskets | Shelves, corners | Natural, organized | Dust regularly |
Layer these textiles throughout your area. Combine them on surfaces for a cohesive look. Start with one piece if you feel overwhelmed.
Adding Greenery with Real and Faux Plants
Plants bring life and freshness to any setup. Real varieties like snake plants purify air naturally. Pothos vines add vibrancy with their trailing leaves.
Choose plants that thrive in your light conditions. Low-light options include zz plants and peace lilies. They require minimal care while providing major impact.
Faux plants offer beauty without maintenance. Modern options look incredibly realistic from a distance. They stay perfect regardless of light or watering schedules.
Select stylish pots that match your decor theme. Neutral containers keep the focus on the greenery itself. Group plants of varying heights for visual balance.
Greenery softens hard edges and adds organic texture. It complements both modern and traditional styles beautifully. Your space feels more alive and inviting with these natural elements.
Texture transforms basic areas into beautifully layered environments. It creates the depth and interest that make spaces feel complete. Your personal retreat gains both style and comfort through thoughtful material choices.
Adding Personality with DIY and Thrifted Decor
Your personal retreat gains soul through unique items that tell your story. These special pieces transform generic spaces into environments that feel authentically yours.
Handmade discoveries and vintage finds add character that mass-produced items lack. They bring history and meaning beyond simple aesthetics.
Easy DIY Projects for a Custom Look
Simple crafts let you express creativity while saving money. Macrame wall hangings add bohemian texture with minimal effort.
Hand-painted canvases introduce personal art without gallery prices. Customized furniture through paint or new hardware refreshes existing pieces.
Try dyeing textiles for coordinated color schemes. These projects offer satisfaction through hands-on creation.
DIY elements become conversation starters with built-in stories. They reflect your personal touch in every detail.
How to Thrift Unique Pieces for Your Space
Local thrift stores hide treasures waiting for discovery. Look for solid furniture with good structure that needs minor updates.
Online marketplaces offer convenient searching from home. Flea markets provide vintage items with historical charm.
Focus on pieces that match your overall vision. A fresh coat of paint or new upholstery can transform finds.
These one-of-a-kind items bring uniqueness to your room. They often cost less than new mass-produced alternatives.
Displaying Your Hobbies and Collections
Your passions deserve visible celebration in your personal area. Books arranged creatively become both decor and entertainment.
Vinyl records displayed on walls blend nostalgia with style. Art supplies organized beautifully inspire creativity daily.
Use shelves or shadow boxes for organized presentation. This prevents clutter while highlighting meaningful items.
A guitar on a stand or favorite novels on display add functional beauty. These elements make your space truly reflective of your life.
Curate collections thoughtfully to maintain visual balance. Rotate pieces seasonally to keep displays fresh and engaging.
Personal elements through DIY and thrifting ensure authentic expression. Your room becomes a budget-friendly reflection of your unique story.
Common Pinterest Bedroom Mistakes and How to Fix Them

Even the most beautiful inspiration boards can face real-world challenges. These common errors often prevent spaces from achieving their full potential. Fortunately, simple adjustments can transform disappointing results into dream setups.
Why Your Bed Looks Flat and How to Plump It Up
A flat sleeping area lacks the inviting appeal seen in photos. This usually happens with single duvet inserts and minimal layers. Wrinkled bedding or improper pillow arrangements also contribute to this issue.
Double your duvet insert for instant volume. This creates that luxurious hotel-style appearance. Add textured throws and carefully arranged pillows for depth.
Steam your bedding to eliminate wrinkles. This crisp finish makes everything look more intentional. Select pillows in coordinating sizes and fabrics for visual harmony.
Fold the duvet down to reveal beautiful sheets underneath. A quality mattress topper adds comfort and height. These quick fixes transform flat surfaces into plush retreats.
Fixing Harsh or Uneven Lighting
Poor illumination creates unflattering shadows and cold atmospheres. Harsh overhead fixtures often cause this problem. Cool-toned bulbs make spaces feel clinical rather than cozy.
Layer your light sources for balanced coverage. Combine ambient, task, and accent lighting. Warm bulbs (2700K-3000K) create inviting glows.
Position lights indirectly to avoid harsh shadows. Fairy lights and LED strips add affordable dimension. Dimmable options allow adjustment throughout the day.
Test your setup with phone cameras before finalizing. This reveals how things appear in photos. Adjust placements until you achieve that dreamy effect.
Balancing Clutter and Minimalism for a Curated Feel
Too many items compete for attention and create visual noise. Too few elements leave spaces feeling cold and impersonal. The sweet spot lies between these extremes.
Edit your surfaces regularly. Remove items that don’t serve a purpose or bring joy. Group remaining pieces using the rule of three for harmony.
Vary heights and textures within arrangements. This creates depth while maintaining cohesion. Use storage solutions like baskets to hide essentials.
Incorporate personal touches that tell your story. Meaningful items make spaces feel authentically yours. They provide character without clutter.
Evaluate your area with fresh eyes occasionally. Photographs often reveal issues missed in daily living. Make small adjustments as needed.
These common mistakes have simple solutions. Addressing them creates more functional and visually appealing environments. Your personal area becomes both comfortable and share-worthy.
Bringing Your Pinterest Board to Life: Final Assembly Tips
Your vision board becomes reality through careful finishing touches. This final phase polishes every detail for a cohesive result. You’ll ensure your area feels both photogenic and perfectly personal.
Staging Your Room for the Perfect Photo
Capture your hard work with beautiful images. Clean all surfaces thoroughly before shooting. Dust and fingerprints disappear under proper lighting.
Fluff pillows and arrange throws artfully. Adjust window treatments for balanced natural light. Remove any clutter or distracting items from view.
Use props like open books or fresh flowers. These elements add life and movement to static shots. Position them where they look naturally placed.
Shoot during golden hour for soft, flattering shadows. This magical time occurs just after sunrise or before sunset. Your photos gain professional quality instantly.
Making Last-Minute Adjustments for Cohesion
Step through your space with fresh eyes. Notice any elements that feel slightly off. Small tweaks often make big improvements.
Adjust decor placements for better visual flow. Ensure colors balance throughout the area. Sometimes moving one item creates perfect harmony.
Check furniture angles from multiple viewpoints. Everything should look intentional from all perspectives. This creates a fully realized environment.
Consider these quick refinement techniques:
- Straighten curtains and rug placements
- Add fresh greenery for natural vibrancy
- Adjust lighting to eliminate harsh shadows
Take test photos to identify issues. Glare or clutter becomes obvious in images. Make corrections before final photography.
Stepping Back and Admiring Your Work
Pause to appreciate your transformed area. Notice how everything works together beautifully. Your vision now exists in physical form.
Celebrate this achievement with friends or online. Sharing your success reinforces creative efforts. It also inspires others with similar goals.
Note any areas for future updates. Personal tastes evolve over time. Your space can grow along with your style preferences.
Remember that final assembly ensures both beauty and function. Your retreat should feel comfortable for daily living. It also photographs beautifully for sharing.
| Photo Preparation Step | Key Action | Time Required | Impact Level |
|---|---|---|---|
| Surface Cleaning | Wipe all visible areas | 15 minutes | High |
| Lighting Adjustment | Set lamps and open curtains | 10 minutes | Critical |
| Styling Props | Place books, plants, textiles | 20 minutes | Medium |
| Angle Testing | Photograph from various positions | 15 minutes | High |
Enjoy your beautifully assembled personal haven. It represents your creativity and dedication. This finished space deserves both admiration and everyday enjoyment.
Enjoying Your New Serene and Stylish Retreat
Your journey has led to a truly personal sanctuary. This room now reflects your unique vision and hard work.
Embrace the calming vibe of your new space. Spend time reading in cozy corners or relaxing in your comfortable bed.
Your retreat offers daily escape and promotes better rest. It’s a functional haven that enhances your overall life.
Share your success with others who might feel inspired. Your experience could help friends with their own projects.
Remember to occasionally refresh your decor. Small seasonal updates keep the aesthetic feeling current and exciting.
Take pride in what you’ve accomplished. This beautiful environment will serve you well for years to come!