Ever walk into your sleeping area and wish it had more breathing room? You’re not alone. Many homeowners face the challenge of compact living spaces.
Strategic reflective surfaces can work wonders for your personal sanctuary. They create optical illusions that expand your perceived area dramatically.
These clever design tricks do more than just add visual interest. They actually play with light and perspective to make your environment seem more open and airy.
The best part? These techniques work regardless of your room’s dimensions or layout. Countless people have transformed spaces under 1,000 square feet using these methods.
In this guide, you’ll discover practical advice from basic principles to advanced design strategies. Get ready to unlock the full potential of your personal retreat!
We’ll show you how to implement these ideas with confidence. These space-enhancing techniques can create stunning results when applied correctly.
Why Mirrors Are Your Secret Weapon for a Spacious Bedroom

The secret to expanding your sleeping space might already be hanging in your hallway. Reflective surfaces work magic through clever optical tricks that fool the eye.
These surfaces bounce both sunlight and artificial illumination around your area. This creates a brighter, more open atmosphere that changes how you experience the space.
The psychological effect is quite remarkable. When you see additional “space” reflected back at you, your brain interprets this as actual square footage.
Designers often use this technique in compact apartments with stunning results. One client reported their 400-square-foot studio suddenly felt like a luxury suite after strategic placement.
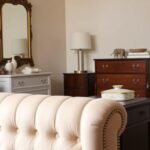
These reflective elements serve dual purposes beautifully. They become stunning focal points while simultaneously expanding your visual perimeter.
This approach works wonderfully in various living areas beyond just sleeping quarters. Dining spaces, entryways, and sitting rooms all benefit from this design strategy.
In your personal sanctuary, creating a serene environment is crucial. The expanded visual space contributes significantly to that peaceful atmosphere.
Even modest-sized reflective pieces can create dramatic impacts. Strategic placement opposite windows or interesting architectural features maximizes the effect.
Beyond the spatial benefits, you gain practical functionality too. These surfaces become invaluable for dressing and grooming routines.
“The transformation was immediate – what felt cramped now breathes with elegance and space.”
Many homeowners report 30-50% perceived space increases after implementation. This simple change delivers one of design’s best returns on investment.
Lay the Groundwork: Maximizing Light and Color

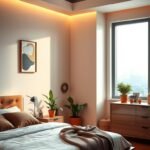
Your color palette plays a crucial role in determining how spacious your area appears. This foundation sets the stage for all other design elements to work their magic.
Light hues have a remarkable ability to bounce illumination around your space. They create an airy atmosphere that feels open and inviting.
Embrace a Light and Airy Color Palette
Light colors reflect rather than absorb illumination, fundamentally changing how your space is perceived. This simple principle can transform even the most compact areas.
Soft whites, pale grays, and creamy neutrals work exceptionally well for creating expansive feelings. These shades maximize the available natural light throughout the day.
The transformation from dark to light tones can be dramatic. Many homeowners report their spaces feeling significantly larger after this change.
“Switching from navy blue to soft ivory made my studio apartment feel twice as large. The difference was immediate and stunning.”
You can balance these light schemes with personal style through accent pieces and textiles. This approach maintains personality while maximizing the spacious effect.
Different times of day affect how these colors perform. Morning light creates soft warmth, while afternoon sun enhances brightness.
Strategize Your Window Treatments
Window treatments offer another powerful way to enhance your space’s perception. The right approach can dramatically improve how your room look and feels.
Removing dated blinds or heavy shutters maximizes light penetration. This simple change allows more illumination to flood your area.
The ceiling-to-floor curtain technique creates a brilliant height illusion. Hanging drapes from the highest point makes walls appear taller.
Place curtain rods as high as possible, ideally within 2-3 inches of the ceiling. Ensure curtains gently kiss the floor for maximum openness.
This strategy works beautifully regardless of your space’s dimensions. Even rooms with limited windows benefit from proper treatment.
For areas with minimal light access, consider sheer fabrics that diffuse illumination softly. These maintain privacy while maximizing brightness.
Your Step-by-Step Guide to Mirror Wall Decor for a Bigger Feel

Ready to transform your personal sanctuary? This hands-on guide walks you through practical techniques that truly deliver results. You’ll learn professional strategies that designers use to create stunning visual expansions.
Each step builds upon the last, creating a comprehensive approach to spatial enhancement. These methods work beautifully in various room configurations and sizes.
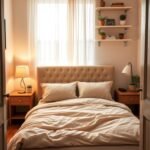
Choosing the Right Mirror for Your Space
Selecting the perfect reflective surface makes all the difference in your design scheme. Consider both aesthetic appeal and functional impact when making your choice.
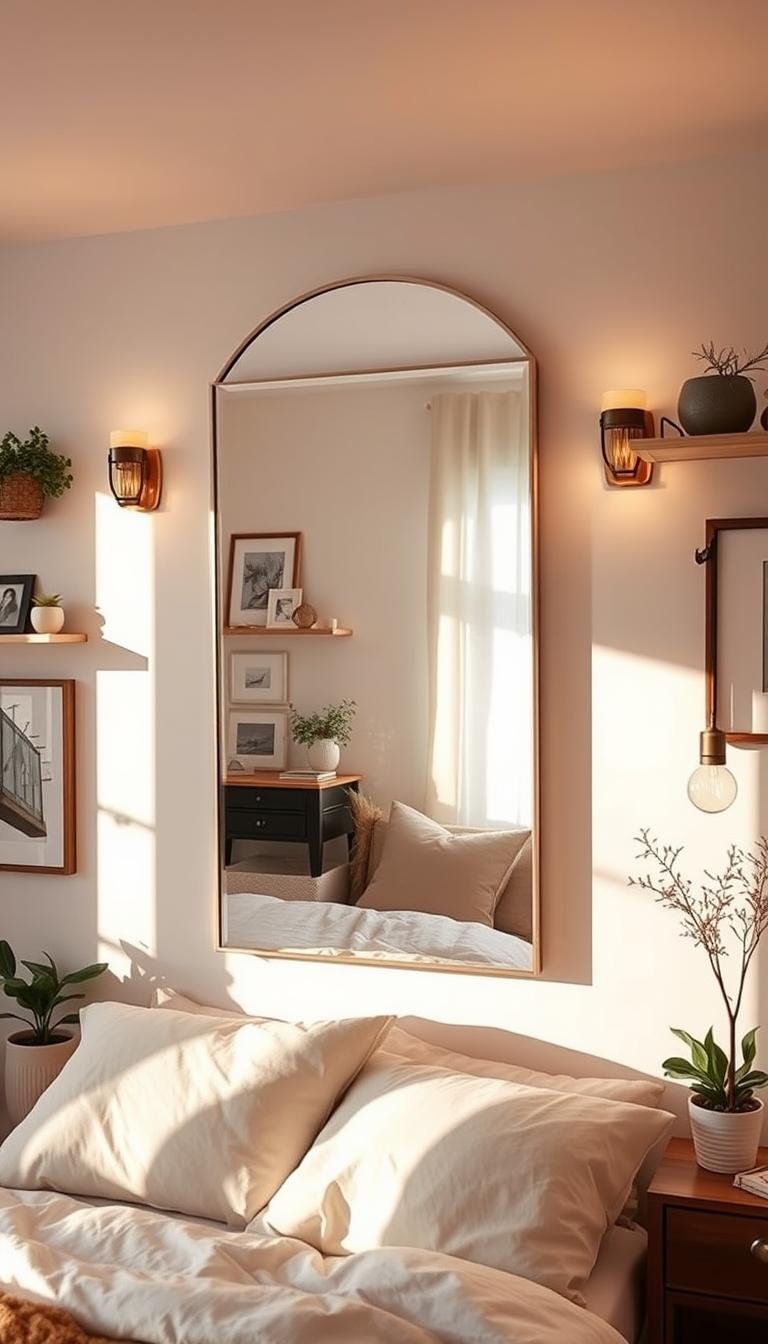
Full-length versions create remarkable vertical elongation that makes ceilings appear higher. They’re particularly effective in narrow areas where every inch counts.
Frame selection significantly influences the overall effect. Slim, minimalist frames tend to disappear visually, enhancing the expansive quality.
Ornate frames can become stunning focal point elements when chosen carefully. They add character while still serving their space-enhancing purpose.
| Room Size | Recommended Mirror Size | Best Placement |
|---|---|---|
| Under 100 sq ft | 24-36 inches wide | Opposite window or above dresser |
| 100-200 sq ft | 36-48 inches wide | Centered on largest wall |
| Over 200 sq ft | 48+ inches wide | Grouped arrangement or statement piece |
“The right mirror completely changed my perspective – both literally and figuratively. My space finally breathes.”
Strategic Placement: Opposite Windows and Focal Points
Positioning is everything when working with reflective surfaces. The magic happens when you capture and multiply what’s already beautiful in your space.
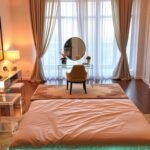
Place your surface directly across from window openings whenever possible. This technique pulls outdoor scenery indoors, creating incredible depth perception.
Height placement dramatically affects how your space is perceived. Hang pieces at eye level or slightly higher to create that coveted taller room illusion.
Corners benefit tremendously from tall, slender installations. They catch illumination from multiple angles, brightening the entire area.
Always ensure your reflection shows something interesting or beautiful. Avoid reflecting cluttered areas or blank walls for maximum impact.
Creative Grouping and Sizing for Maximum Impact
Multiple surfaces can work together to create coordinated visual effects. The key is maintaining balance and intentionality in your arrangement.
Create movement and depth through carefully curated collections. Vary sizes and shapes while maintaining a cohesive style theme.
Odd-number groupings (3, 5, or 7 pieces) often create the most dynamic arrangements. They guide the eye naturally around the space.
Ensure proper proportion relative to your wall size and furniture scale. A too-small piece gets lost, while an oversized one can overwhelm.
For challenging layouts, consider leaning larger pieces against walls. This creates a relaxed, elegant look while still maximizing light reflection.
Remember that sometimes less truly is more. One perfectly placed statement piece often outperforms multiple smaller ones.
Select Furniture That Enhances the Illusion of Space

Smart furniture selection can dramatically transform your room’s perceived dimensions. The pieces you choose either enhance openness or create visual clutter.
Every item should serve multiple purposes while maintaining aesthetic appeal. This approach maximizes your available square footage beautifully.
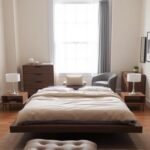
Opt for Pieces with Visible Legs
Furniture with exposed legs creates an airy, elevated sensation. This design trick makes your area appear less crowded and more open.
Platform beds with slender legs work particularly well. They allow light to flow underneath, enhancing the spacious effect.
Not every piece needs legs, but incorporating several creates balance. The visual weight reduction makes your entire setup feel lighter.
This principle applies to dressers, nightstands, and seating options. Even one “leggy” piece can improve how your entire area flows.
Incorporate Multi-Functional and See-Through Pieces
See-through furniture offers brilliant spatial advantages. Glass or acrylic pieces seem to disappear visually while serving practical needs.
Consider transparent nightstands or lucite chairs. They provide function without dominating your visual field.
Multi-functional items save precious floor space wonderfully. Storage ottomans become seating and organization solutions simultaneously.
Murphy beds or fold-down desks maximize flexibility. They transform your area based on immediate needs throughout the day.
Arrangement techniques significantly impact openness. Avoid pushing all pieces against walls—this actually makes areas feel smaller.
Create conversational groupings with breathing room between items. This improves traffic flow and enhances the spacious sensation.
Scale matters tremendously in compact areas. Choose proportionally sized pieces that complement rather than overwhelm your dimensions.
“Swapping my solid wood nightstands for glass-top versions made my area feel instantly larger. The difference was astonishing.”
Mix styles while maintaining visual coherence. Lighter-colored woods and metallic finishes enhance the airy atmosphere.
Remember that negative space is your friend. Leaving areas open creates rhythm and makes your entire setup feel intentional.
Your furniture choices ultimately determine how your personal retreat feels. Strategic selections create that coveted open, expansive quality.
Use Art and Décor to Draw the Eye and Expand Perception

Your decorative choices can dramatically influence how spacious your area appears. The right selections guide vision in ways that enhance your perception of square footage.
Strategic placement and sizing create visual pathways that make walls seem farther apart. This approach transforms how you experience your personal retreat every day.
Go Big with Statement Art
Oversized artwork creates powerful focal points that command attention. These substantial pieces give your eye a clear resting place, making walls appear more distant.
Smaller artworks actually diminish spatial perception by creating visual clutter. Multiple tiny pieces compete for focus rather than creating cohesive expansion.
Murals offer exceptional space-enhancing possibilities. They draw vision from floor to ceiling, creating incredible vertical dimension.
Choose pieces that complement your color scheme while adding visual interest. Abstract works with flowing lines often create wonderful movement effects.
| Wall Size | Recommended Art Size | Optimal Placement |
|---|---|---|
| Narrow wall (under 5 ft) | One large vertical piece | Eye level, centered |
| Standard wall (5-8 ft) | Single statement piece | Slightly above eye level |
| Large wall (over 8 ft) | Oversized artwork or mural | Centered with breathing room |
“Switching from several small prints to one large canvas transformed my space. The wall suddenly felt twice as deep and far more sophisticated.”
Apply the “Cantaloupe Rule” for Accessories
This clever design principle prevents visual clutter beautifully. It states that no decorative piece should be smaller than a cantaloupe melon.
Larger accessories create stronger visual impact with fewer items. They establish clear focal points rather than scattered distractions.
Group smaller items in clear containers to create unified displays. This technique maintains visual weight while organizing cherished collections.
Seasonal changes should follow the same sizing guidelines. Choose a few substantial seasonal pieces rather than numerous small decorations.
Functional items can serve dual purposes as decorative elements. Beautiful trays, boxes, and bowls organize while enhancing your room look.
Remember that negative space is equally important. Allow breathing room around each decorative element for maximum visual impact.
Implement Smart Storage Solutions to Declutter Your Space
Hidden compartments and smart organization create visual breathing room. When you eliminate clutter, your area instantly appears more open and inviting.
Clear pathways and surfaces make your environment feel significantly larger. This psychological effect works wonders for creating that spacious sensation you desire.
Every item needs a proper home in your organizational system. This approach maintains order and enhances your daily experience.
Utilize Vertical Space with High Shelving
Vertical storage solutions maximize your wall area beautifully. They keep your floor clear while providing ample organization options.
Install shelves near the ceiling to draw eyes upward. This technique creates height illusion while storing infrequently used items.
Floating shelves work particularly well for displaying decorative pieces. They maintain clean lines without bulky brackets or supports.
Consider these vertical storage measurements for optimal results:
| Ceiling Height | Recommended Shelf Depth | Ideal Placement Height |
|---|---|---|
| 8 feet | 8-10 inches | 6-12 inches below ceiling |
| 9 feet | 10-12 inches | 12-18 inches below ceiling |
| 10+ feet | 12-14 inches | 18-24 inches below ceiling |
“Adding high shelving changed everything. My collections stay organized while my floor space remains completely open and accessible.”
Choose Furniture with Built-In Storage
Multi-functional pieces serve dual purposes wonderfully. They provide storage while maintaining your aesthetic vision.
Platform beds with underneath compartments offer brilliant hidden space. These solutions maximize every square inch of your area.
Window seats with lift-up lids create charming storage opportunities. They become cozy reading nooks while hiding seasonal items.
Consider these built-in storage options for your space:
- Ottomans with hidden compartments for linens
- Headboards with shelving for books and accessories
- Benches with interior storage for extra bedding
- Nightstands with drawers for personal items
Custom built-ins can transform awkward areas into functional space. They create seamless storage that blends with your architecture.
Choose pieces that match your existing decor style. This maintains visual harmony while adding practical organization.
Maintain your system with regular seasonal reviews. This prevents clutter from accumulating over time.
Your storage solutions should work with your lifestyle. The right system keeps your environment peaceful and organized.
Think Vertically to Elevate Your Room’s Dimensions
Looking upward might be the key to expanding your room’s visual dimensions. Vertical elements create powerful illusions that dramatically change how you experience your space.
These design strategies work with your natural eye movement. They guide vision upward, making ceilings appear higher and walls seem farther apart.
The psychological effect is quite remarkable. When you emphasize height, your brain interprets the entire area as more substantial and open.
Hang Curtains from Ceiling to Floor
This technique creates instant height enhancement. Install curtain rods as high as possible, ideally within 2-3 inches of your ceiling.
Ensure curtains gently touch the floor for maximum openness. This continuous vertical line draws eyes upward beautifully.
Choose lightweight fabrics that flow gracefully. Heavy materials can overwhelm rather than enhance your vertical illusion.
Consider these installation measurements for optimal results:
| Ceiling Height | Rod Placement | Curtain Length |
|---|---|---|
| 8 feet | 7.5 inches from ceiling | 84 inches (touching floor) |
| 9 feet | 8 inches from ceiling | 96 inches (touching floor) |
| 10 feet | 9 inches from ceiling | 108 inches (touching floor) |
“Hanging my curtains higher transformed the entire room. Suddenly, my standard-height ceilings felt cathedral-like and majestic.”
Incorporate Tall, Vertical Furniture
Tall bookcases and armoires create wonderful height emphasis. They draw vision upward without consuming valuable floor space.
Choose pieces that reach toward your ceiling. This creates continuous vertical lines that enhance the spacious effect.
Consider these vertical furniture options:
- Floor-to-ceiling bookcases for storage and display
- Tall, narrow dressers that maximize vertical space
- Slender floor lamps that draw eyes upward
- Vertical room dividers that define space elegantly
Arrange taller pieces against longer walls. This balances proportions and creates harmonious visual flow.
For lower ceilings, choose furniture that stops just short of the top. This prevents a cramped feeling while still emphasizing height.
Vertical decor elements add finishing touches beautifully. Tall plants, vertical artwork, and hanging elements all contribute to the height illusion.
Painting or wallpapering your overhead surface creates dramatic impact. Lighter colors reflect light, while patterns draw attention upward.
Elongated flooring patterns enhance length perception. They create visual pathways that make your space feel more expansive.
Balance vertical and horizontal elements for harmonious design. Too much vertical emphasis can feel overwhelming without proper balance.
For challenging proportions, create focal points at eye level. Then use vertical elements to guide vision upward from these anchors.
Every space can benefit from vertical design strategies. These techniques work regardless of your starting dimensions or layout.
Explore Advanced Design Tricks for a Custom Look
Ready to take your personal retreat to the next level? These creative approaches add personality while maximizing your square footage.
Custom elements transform ordinary areas into extraordinary environments. They create unique focal points that enhance spatial perception beautifully.
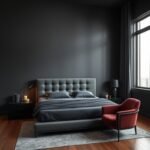
Consider an Accent Wall or Ceiling Treatment
Feature walls create instant visual interest that draws attention away from limited dimensions. They establish a clear focal point that enhances depth perception.
Choose a wall opposite your entry point for maximum impact. This technique guides vision through your space, making it feel more expansive.
Consider these popular accent wall treatments:
- Bold wallpaper patterns that create depth and movement
- Textured finishes like shiplap or reclaimed wood
- Contrasting paint colors that recede visually
- Geometric designs that create optical illusions
Overhead treatments dramatically affect height perception. Painting your ceiling a lighter color than your walls creates upward lift.
Consider subtle patterns or metallic finishes for overhead surfaces. These catch and reflect light beautifully throughout the day.
“My accent wall completely transformed the room’s proportions. What felt cramped now has incredible depth and character.”
Installation requires proper surface preparation. Always test colors and materials in your actual lighting conditions before committing.
The Innovative Mirror Hidden Door Solution
This brilliant concept combines functionality with spatial enhancement. It provides secret storage while reflecting light throughout your area.
These specialized doors feature full-length reflective surfaces. They blend seamlessly with your wall while offering practical access to hidden spaces.
The Murphy Door system represents a popular option for many homes. It eliminates the need for additional furniture while maintaining clean lines.
Consider these benefits for your space:
- Creates additional storage without consuming floor area
- Reflects light and views to enhance spaciousness
- Maintains minimalist aesthetic with hidden functionality
- Works with various architectural styles and room configurations
Professional installation ensures proper operation and alignment. DIY approaches require advanced carpentry skills and precise measurements.
These solutions work particularly well in contemporary design schemes. They maintain visual simplicity while providing practical organization.
Regular maintenance keeps mechanisms operating smoothly. Gentle cleaning preserves the reflective surface without streaks or damage.
Budget considerations include both material and installation costs. Custom sizes and finishes may require additional investment.
Many homeowners report excellent return on investment with these features. They add both functionality and visual appeal to compact areas.
These advanced techniques adapt beautifully to various personal styles. From modern minimalist to traditional elegance, they enhance any environment.
Consult with design professionals when considering complex installations. Their expertise ensures optimal results for your specific space.
Bringing It All Together for Your Dream Bedroom
You now have all the tools to create a sanctuary that truly reflects your style. These principles work wonders to help your room feel bigger and more inviting.
Start with light colors and smart furniture placement. Add reflective surfaces opposite windows to maximize natural light.
Many have transformed their spaces using these methods. Your personal retreat can become the peaceful haven you deserve.
Remember that organization is key to maintaining openness. Keep surfaces clear and utilize hidden storage solutions.
These techniques adapt beautifully as your needs evolve. Your space can grow with you through different life stages.
For additional guidance, consult interior design resources or professionals. They can provide personalized advice for your specific layout.
Your journey toward a more spacious sanctuary starts today. Embrace these changes and watch your personal area transform beautifully.