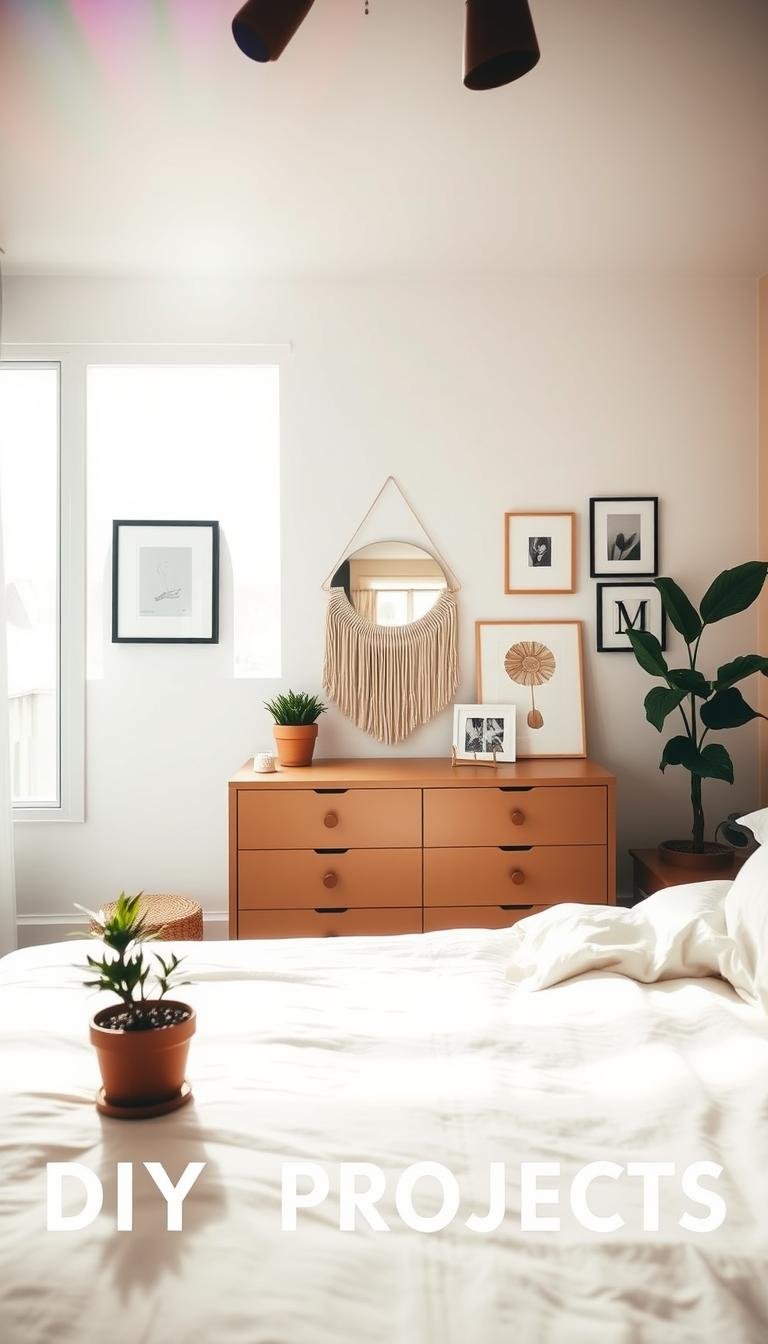
Does your personal space need a fresh look without draining your wallet? You can transform your room with creative touches that show off your unique style.
These simple home decor ideas let you add personality to your surroundings. You don’t need expensive materials or advanced skills to make a big impact.
Many projects use items from stores like Dollar Tree or thrifted finds. This approach is both budget-conscious and eco-friendly.
Starting small builds confidence while creating visual interest in your area. Whether you’re revamping walls or refreshing furniture, the possibilities are endless.
This guide will walk you through various approaches to personalize your home. Discover how easy and satisfying it is to craft a cozy retreat that truly reflects you.
Why Choose DIY Bedroom Decor Projects (Beginner Friendly)
Personalizing your space brings a special kind of joy. It lets you create a home that truly feels like your own.
Making your own decor is a fantastic way to save money. Many projects cost less than $20, which is far cheaper than buying new items.
You can express your unique style through handmade pieces. This ensures your room reflects your personality and tastes.
Crafting offers therapeutic benefits too. It reduces stress and provides a creative outlet in your daily routine.
Even if you’re new to crafting, you can succeed. Beginner-friendly ideas are designed to be simple and low-risk.
Using repurposed materials is eco-friendly. It reduces waste and gives old items new life.
Completing a project yourself brings pride and satisfaction. It deepens your connection to your personal space.
Customization is another big advantage. You can match colors, sizes, and themes to your existing setup.
Worried about time? Many projects are quick. You can finish them in just an afternoon.
Start with simple ideas to build skills and confidence. Then move on to more advanced creations.
Overall, making your own decor is fun and rewarding. It turns your room into a personalized sanctuary you’ll love.
Gathering Your DIY Toolkit: Essentials for Getting Started

Before diving into creative endeavors, having the right supplies makes all the difference. A well-stocked toolkit transforms ideas into reality with ease.
Start with these fundamental materials that work across multiple projects:
- Mod Podge – perfect for decoupage and sealing
- Acrylic paint in your favorite colors
- Various paintbrushes for different effects
- Fabric scraps or remnants
- Sharp scissors for precise cutting
- Hot glue gun for quick adhesion
Smart sourcing keeps costs low while adding character. Dollar stores offer amazing basics like brushes, glue, and small containers. Thrift stores become treasure hunts for unique pieces waiting for new life.
For woodworking ventures, include these essentials:
- Measuring tape for accurate dimensions
- Hammer and assorted nails
- Screwdriver set with multiple heads
- Sandpaper for smooth finishes
Keep a stash of versatile materials ready for spontaneous creativity. Canvases, scrapbook paper, and yarn enable instant art and textile projects when inspiration strikes.
Safety should always come first. Wear gloves when handling paints or adhesives. Work in well-ventilated areas, especially when using strong products.
Organization streamlines your process. Designate a specific area for supplies with clear containers. This saves time and reduces frustration during projects.
Investing in quality tools pays off over time. Better equipment handles repeated use and delivers superior results. Your initial investment grows with your skills.
Gather all materials before beginning any project. This prevents mid-craft interruptions and ensures successful completion.
With these basics assembled, you’re prepared for any creative challenge. Your personalized space awaits your unique touch.
Whether you’re refreshing existing furniture or creating entirely new pieces, your toolkit supports your vision. Each project becomes an expression of your personal style.
Transform Your Walls with Easy DIY Art
Blank walls offer the perfect canvas for expressing your personal style through creative artwork. You don’t need advanced skills to make stunning pieces that add character to your space.
These simple techniques turn basic materials into personalized decorations. Each project costs under $10 and takes less than an hour to complete.
Choose colors and themes that match your existing decor. The results will reflect your unique personality and design preferences.
Create a Magazine Collage Canvas
Gather magazines with images that inspire you. Cut out pictures, patterns, and text that catch your eye.
Arrange these elements on a blank canvas until you love the composition. Use Mod Podge to adhere everything securely.
Apply a final coat of sealant for protection and shine. This creates a personalized piece full of visual interest.
Your collage tells a story through collected imagery. It becomes a conversation starter on your wall.
Design Simple Scrapbook Paper Wall Art
Select patterned paper that complements your room’s color scheme. Cut wood pieces into geometric shapes like squares or triangles.
Adhere the paper to the wood using craft glue. Smooth out any bubbles for a clean finish.
Arrange multiple pieces into an appealing pattern. This modern approach adds texture and depth to your walls.
Mix different patterns for dynamic visual interest. The combinations are endless with available paper designs.
Make Glue Art on Canvas for a Textured Look
Draw your design directly onto canvas using hot glue. Simple patterns work best for beginners.
Let the glue dry completely until hard. This creates raised lines that will hold paint beautifully.
Apply acrylic paint over the entire surface. The color will pool around the textured glue lines.
This technique requires no artistic skill but delivers professional results. The dimensional effect catches light beautifully.
| Project Type | Time Required | Estimated Cost | Skill Level |
|---|---|---|---|
| Magazine Collage | 45 minutes | $8 | Very Easy |
| Scrapbook Paper Art | 30 minutes | $7 | Easy |
| Glue Texture Art | 60 minutes | $9 | Easy |
Start with one project to build confidence. Then create multiple pieces for a gallery wall display.
Arrange your artwork in clusters rather than single pieces. This creates a curated look that reflects your interests.
Experiment with different materials for variation. Try using photos or fabric scraps instead of magazine images.
These techniques transform blank walls into personalized galleries. Your space will feel more inviting and uniquely yours.
Build a Custom Headboard Without the High Cost
Your sleeping area deserves a beautiful focal point that reflects your taste. Creating your own headboard lets you achieve designer style at a fraction of retail prices.
Both methods we’ll explore offer unique advantages for different needs. You can complete either option in just a few hours with minimal supplies.
Paint a Headboard Directly onto Your Wall
This approach turns your wall into a permanent design feature. Start by measuring and marking your desired shape with painter’s tape.
Rectangles and arches work beautifully for this technique. Use interior paint in your favorite shade to fill the outlined area.
Add decorative details like stripes or patterns for extra visual interest. High-quality paint ensures your creation lasts for years.
Consider your long-term layout before committing. This option works best if you don’t plan to rearrange your furniture frequently.
Craft a Headboard from Decorative Wall Panels
Wood panels create a structured look that feels both elegant and custom. Attach three square panels to your wall using appropriate hardware.
This method takes less than an hour from start to finish. The result provides dimension and texture behind your bed.
Panels cost under $50 total, making this incredibly budget-friendly. You can easily remove them if you change your mind later.
Both methods offer significant savings compared to store-bought options. A painted version costs just a can of paint, while panels remain affordable.
Customization is the real advantage here. Choose colors and shapes that complement your existing style.
Whether you prefer minimalist lines or ornate designs, you control the final look. This personal touch makes your space uniquely yours.
Proper measurement ensures your headboard fits perfectly. Center it above your bed and maintain proportional dimensions.
Consider adding functional accents above your creation. String lights or floating shelves enhance both ambiance and utility.
These weekend projects transform your room’s entire atmosphere. You’ll enjoy a refreshed space that showcases your creative vision.
“The best rooms have something to say about the people who live in them.”
Either method adds charm and character to your personal retreat. You achieve a high-end look without the expensive price tag.
Revamp and Repurpose Your Existing Furniture
Your space gains character when you breathe new life into forgotten pieces. Upcycling furniture lets you create custom items that reflect your unique taste.
You can transform tired pieces into stunning focal points. Both painting and decoupage techniques deliver dramatic results with minimal investment.
These methods work wonders on various surfaces and styles. You control the final look to match your room’s personality.
Give an Old Dresser a Fresh Coat of Paint
Start by cleaning the surface thoroughly to remove dirt and grease. Light sanding helps the new paint adhere properly.
Apply primer to create a smooth base for your color. Choose a shade that complements your room’s design scheme.
Use quality paint for a durable finish that withstands daily use. Multiple thin coats work better than one thick application.
Consider adding new hardware for an extra style update. Knobs and pulls complete the transformation beautifully.
This approach costs under $20 but delivers designer results. Your revived piece becomes a functional work of art.
Decoupage a Goodwill Tray or Nightstand
Find solid pieces at thrift stores with good structural integrity. Clean them well before starting your project.
Select patterned paper that matches your color preferences. Cut pieces to fit your surface perfectly.
Apply Mod Podge to adhere the paper smoothly. Seal with additional coats for protection against wear.
You can use fabric or personal photos for extra meaning. This personal touch makes your nightstand truly one-of-a-kind.
The entire project often costs just $3-$5. It brings chic style to your space without breaking your budget.
Both methods emphasize sustainability through creative reuse. You reduce waste while gaining beautiful furniture.
Proper preparation ensures long-lasting results. Always use sealant on frequently used items for durability.
These techniques let you coordinate all pieces in your room. You achieve a cohesive look that flows beautifully.
Shopping at thrift stores offers endless possibilities. Look for solid construction rather than perfect appearance.
Revamping furniture adds both personality and function to your home. You create a space that feels uniquely yours without buying new items.
Create Cozy Textiles to Warm Up Your Space

Soft textiles instantly transform your personal area into a welcoming retreat. These simple crafts add warmth and texture while showcasing your creative side.
You can complete both projects in just a few hours with basic materials. The results bring comfort and character to your surroundings.
Sew Easy Ten-Minute Throw Pillows
Select your favorite material from remnants or old clothing. Cut two identical squares for front and back pieces.
Sew three sides together using straight stitches. Turn right side out and insert stuffing until plump.
Close the final edge with hidden stitches for a clean finish. This quick update refreshes your seating area instantly.
Mix patterns and textures for visual interest. Combine different fabrics for a collected, personal look.
Crochet Your Own Cozy Blanket
Choose soft yarn in colors that complement your palette. Basic chains and single crochets create a beautiful texture.
Work rows until you achieve your desired size. The rhythmic motion becomes relaxing over time.
This handmade piece adds warmth during cooler months. It also serves as a beautiful decorative layer.
Both options cost under $15 when using smart sourcing. Look for fabric remnants and yarn on sale.
Select durable materials that withstand regular use. Machine-washable fabrics ensure easy care.
These crafts require minimal skills but deliver maximum impact. Online tutorials provide helpful guidance.
Handmade textiles infuse your space with personal meaning. They create a curated atmosphere that feels uniquely yours.
Adding cozy elements refreshes your room’s ambiance beautifully. You express creativity while enhancing comfort.
Craft Your Own Lighting for Perfect Ambiance
Lighting transforms your personal space from functional to magical. Custom fixtures create atmosphere while showcasing your unique style.
These projects require minimal technical knowledge but deliver maximum impact. You can complete both options in just a few hours.
Personalized illumination adds warmth and character to your home. The right glow makes your room feel inviting and cozy.
Decoupage a Lampshade with Fabric
Choose fabric that matches your color scheme and personality. Cut the material to fit your shade’s dimensions precisely.
Apply Mod Podge evenly across the surface. Smooth the fabric carefully to avoid wrinkles or bubbles.
Let it dry completely before adding a protective top coat. This technique diffuses light softly through the material.
Use scrap fabric for an affordable update under $5. The customized look adds visual interest to your space.
Patterned paper or personal photos work equally well. This approach lets you coordinate with existing decor pieces.
Make a Table Lamp from Unique Objects
Find interesting items like vintage books or ribbon spools. These objects become conversation-starting bases for your lamp.
Assemble your chosen pieces into a stable foundation. Drill a small hole through the center for wiring.
Add a basic lamp kit available at craft stores. Follow package instructions for safe electrical connections.
This project costs under $20 but looks professionally designed. You control the final height and style completely.
Items with sentimental value add personal meaning to your design. Your creation tells a story while providing functional light.
Safety remains crucial throughout both projects. Ensure all electrical components are properly installed.
Use LED bulbs for energy efficiency and cooler operation. These bulbs last longer and reduce fire risks.
Test your finished lamp thoroughly before regular use. Check that all connections feel secure and stable.
Experiment with different shade shapes and sizes. Each variation casts light in unique patterns across your room.
Your custom lighting reflects your design preferences beautifully. Whether you prefer modern minimalism or rustic charm, you achieve the perfect look.
These functional pieces enhance your space’s atmosphere dramatically. You create a cozy retreat that feels uniquely yours.
Add Greenery with Simple DIY Plant Projects

Bringing nature indoors creates a peaceful atmosphere in your personal area. Plants add vibrant energy and natural beauty to any room.
These projects use basic materials and require minimal effort. You can create stunning displays that refresh your surroundings.
Living elements improve air quality while reducing stress. They transform your space into a calming retreat that feels alive.
Build an Easy Wood Plant Hanger
Create a modern display with scrap wood and simple tools. Cut a plywood block into your desired shape using a saw.
Drill holes at each corner for hanging hardware. Add small hooks along the bottom edge to hold pots securely.
Sand the surface smooth and apply a protective finish. This minimalist design showcases your plants beautifully.
Arrange multiple hangers at different heights for visual interest. This creates a dynamic green wall feature.
Use decorative pots that match your color scheme. Painting containers coordinates them with your existing style.
Propagate Your Own Plants from Cuttings
Expand your collection without spending money on new plants. Take stem cuttings from existing greenery or ask friends for clippings.
Place cuttings in water or moist soil according to plant requirements. Keep them in indirect light while roots develop.
This rewarding process requires patience but delivers lush results. Soon you’ll have new plants ready for potting.
Choose low-light varieties that thrive in indoor conditions. Pothos and snake plants adapt well to various environments.
Both methods cost very little while adding significant value. Scrap wood becomes functional art through creative reuse.
Plant propagation lets you share greenery with others too. It’s a sustainable way to fill your home with life.
Adding natural elements personalizes your space with living decor. You create a fresh atmosphere that reflects your personality.
Whether you’re experienced with plants or just starting, these projects offer satisfying results. They bring tranquility and beauty to your daily routine.
Maximize Space with Smart DIY Storage Solutions
Organizing your personal area creates a calming environment where everything has its place. Clever storage ideas turn unused corners into functional spaces that work for you.
These solutions help you maintain order while expressing your unique taste. You can create systems that fit your specific needs perfectly.
Proper organization reduces visual clutter and makes your area feel more spacious. Everything becomes easier to find when you have designated spots.
Build a Simple Bookshelf for Corners
Unused corners become valuable real estate with a custom shelf unit. Measure your space carefully to ensure a perfect fit.
Cut wood boards to your desired dimensions using basic tools. Assemble with screws for a sturdy structure that holds weight securely.
Sand all surfaces smooth before applying your finish. Paint or stain matches your existing decor for a cohesive look.
This project costs under $20 but adds significant functionality. Your books and display pieces gain a beautiful home.
Hang Textiles and Baskets for Wall Storage
Vertical space offers excellent opportunities for creative organization. Install hooks or rods to hold baskets and fabric containers.
Choose materials that complement your room’s color scheme. Natural fibers like woven baskets add texture and warmth.
These hanging solutions keep frequently used items within easy reach. Blankets, books, and accessories become both accessible and decorative.
Label containers for quick identification of contents. Uniform baskets create a clean, organized appearance.
Both methods work particularly well in compact areas. They maximize every inch without sacrificing style.
Floating shelves offer a modern alternative to traditional bookcases. Rustic crates provide farmhouse charm if that matches your aesthetic.
Always measure twice before cutting or installing anything. Proper planning ensures your storage solutions function perfectly.
Thrift stores often have beautiful baskets at affordable prices. You can find unique containers that add character to your space.
These organizational projects help create a tidy, personalized environment. Your area feels larger and more inviting when everything has its place.
Whether you’re dealing with limited square footage or just want better organization, these ideas deliver practical results. They combine function with beautiful design that reflects your personality.
Design a Personalized Vanity and Mirror Area

Your grooming space deserves the same attention as the rest of your home. Creating a custom vanity area adds both function and flair to your room.
This project combines practical organization with personal style. You can build a beautiful spot that makes your daily routine feel special.
Even small spaces can accommodate a dedicated vanity setup. Clever solutions maximize vertical space while keeping everything accessible.
Frame Your Bathroom or Bedroom Mirror
Transform a plain mirror into a stunning focal point with a simple wood frame. This upgrade adds character and elegance to any space.
Choose wood trim that matches your desired style. Measure your mirror carefully before cutting pieces to size.
Attach the frame using strong adhesive or small nails. This creates a finished look that appears custom-made.
Consider painting the frame to match your color scheme. A contrasting color makes the mirror stand out beautifully.
This approach costs under $30 but delivers high-end results. Your framed mirror becomes a decorative feature rather than just functional.
Create a Vanity from a Small Table
Repurpose a small table into a charming vanity station. Look for pieces with drawers or shelves at thrift stores.
Hang a mirror above the table at eye level. This creates a complete grooming area without taking up much floor space.
Add storage containers for makeup and essentials. Small baskets or decorative boxes keep everything organized and within reach.
Choose a table height that works with your seating preference. Whether you prefer a stool or standing, ensure comfortable use.
This setup provides a dedicated spot for your morning routine. Everything stays tidy and readily available when you need it.
Functionality meets beauty in this practical project. Your vanity area keeps essentials organized while adding visual appeal.
Cost savings make this approach particularly attractive. Repurposed furniture and basic framing materials keep expenses low.
Select a mirror size that fits your space proportionally. Consider both the table width and wall area when choosing.
Tables with built-in storage offer extra convenience. Drawers hide clutter while keeping items easily accessible.
Framed mirrors become elegant statement pieces. They add refinement to your bedroom or bathroom decor.
Coordinate colors for a cohesive look. Paint your frame and table in matching or complementary shades.
This solution works perfectly in compact areas. It utilizes vertical space efficiently without crowding the room.
Add personal touches like a comfortable stool or decorative trays. These elements enhance both comfort and style.
Your custom vanity area combines luxury with practicality. It creates a personalized spot tailored to your specific needs.
This project transforms an ordinary corner into a special retreat. You’ll enjoy having a beautiful, functional space all your own.
Update Your Windows with Custom Window Treatments
Your windows deserve more than just standard coverings. Custom treatments elevate your room’s entire atmosphere while offering practical benefits.
These simple updates transform how light enters your space. They also provide privacy and style on your terms.
Whether you’re crafting shades or adjusting rods, both methods deliver dramatic results. You control the final look to match your personal taste.
Sew an Easy Roman Shade for Privacy
Create a tailored window covering with basic sewing skills. Start by measuring your window’s exact dimensions.
Cut fabric slightly wider than your measurements for seam allowance. Choose material that suits your light control preferences.
Blackout fabric blocks light completely for better sleep. Sheer materials filter sunlight softly for a bright, airy feel.
Install a tension rod inside the window frame for support. This requires no drilling and remains completely reversible.
Your custom shade offers perfect privacy and light management. It folds neatly when not in use, saving valuable space.
This project costs under $15 with remnant fabric. You achieve a high-end look without the designer price tag.
Adjust Your Curtain Rod Height for Drama
Elevate your curtain rod closer to the ceiling line. This simple trick creates the illusion of taller windows.
Your room feels more open and spacious instantly. The vertical emphasis draws eyes upward, adding architectural interest.
Choose extendable rods from hardware stores for easy installation. They adjust to fit various window widths perfectly.
Mount brackets securely into wall studs for safety. This ensures your curtains hang properly without sagging.
Full-length curtains pooling slightly on the floor add elegance. This luxurious touch makes your space feel curated.
Both methods offer affordable ways to refresh your view. Fabric from sales or remnants keeps costs minimal.
Patterned materials make windows decorative features. Bold colors or prints inject personality into your design.
Always measure twice before cutting or installing. Precise measurements ensure professional-looking results.
These updates can be completed in a single day. You enjoy immediate transformation without lengthy projects.
Custom window treatments personalize your space while improving function. They blend style with practical benefits beautifully.
Incorporate Personal Memories into Your Decor

Your home becomes more meaningful when filled with cherished moments. Displaying personal photographs transforms your space into a reflection of your life’s journey.
These creative projects let you surround yourself with happy memories. You can turn favorite images into beautiful decor that tells your unique story.
Both techniques we’ll explore preserve special moments in stylish ways. They add emotional depth to your room while showcasing your personality.
Design a Meaningful Photo Collage Wall
Create a visual timeline of your favorite memories on any blank wall. Start by selecting photographs that represent important life events.
Arrange your images in a pattern that flows naturally. You might group them by theme, chronology, or color scheme.
Choose frames that complement your existing style. Uniform black frames create a gallery look, while mixed styles feel more eclectic.
Leave space between photos for visual breathing room. This prevents the display from feeling overcrowded or chaotic.
Your collage can grow over time as new memories happen. This living display evolves with your life experiences.
This approach costs very little but delivers maximum emotional impact. Printed photos remain affordable through online services.
Transfer Photos to Canvas or Pillows
Transform ordinary items into personalized treasures using photo transfer techniques. Mod Podge Photo Transfer Medium makes this process simple.
Select high-quality images with good contrast and clarity. These transfer best onto fabric or canvas surfaces.
Prepare your surface by ensuring it’s clean and smooth. Apply the transfer medium according to package directions.
Experiment with different effects for varied looks. Black-and-white transfers create timeless elegance, while sepia tones offer vintage charm.
Photo pillows add sentimental value to your bedding. They become functional pieces that spark joyful memories daily.
Canvas transfers create durable art that lasts for years. They withstand handling while maintaining image quality.
| Project Type | Time Required | Skill Level | Emotional Value |
|---|---|---|---|
| Photo Collage Wall | 60 minutes | Easy | High |
| Canvas Photo Transfer | 90 minutes | Intermediate | Very High |
| Pillow Photo Transfer | 75 minutes | Intermediate | High |
Always use high-resolution images for the clearest results. Most printing services offer quality options at reasonable prices.
Test your transfer technique on scrap material first. This ensures you perfect the process before working on final pieces.
These memory projects make your room feel truly yours. They surround you with meaningful moments that bring daily joy.
Your space becomes a sanctuary filled with personal history. Every glance at your creations reminds you of life’s beautiful moments.
Refresh Your Bedding and Floor Decor
Your floor and bedding areas offer wonderful opportunities to add comfort and character. Simple updates can transform these spaces with warmth and personal style.
These two projects bring both function and beauty to your room. They create a cozy atmosphere while keeping everything organized and accessible.
Craft a DIY Floor Cloth from Durable Fabric
Create a beautiful and practical floor covering using sturdy fabric and Mod Podge. This washable alternative to traditional rugs adds pattern and protection.
Choose material that complements your color scheme and withstands foot traffic. Cut it to your desired size, leaving extra for hemming if needed.
Apply Mod Podge to the back of the fabric and smooth it onto a canvas drop cloth. This creates a strong bond that holds up well over time.
Add multiple coats of sealant for extra durability and easy cleaning. Your custom piece becomes both decorative and functional.
Sew a non-slip backing for safety on smooth surfaces. This prevents slipping while adding comfort underfoot.
Consider painting designs directly onto the fabric for a truly unique look. Stencils help create professional patterns without artistic skill.
Build a Rustic Blanket Ladder for Display
Construct a charming ladder from basic wood pieces to showcase your favorite throws. This project adds vertical interest while keeping blankets tidy.
Select wood that matches your existing furniture and style. Cut two longer pieces for the sides and several shorter rungs.
Assemble using wood glue and nails for a sturdy structure. Sand all surfaces smooth before applying your chosen finish.
This functional piece keeps throws accessible yet organized. It also serves as a beautiful decorative element in your space.
You can easily move the ladder when rearranging your layout. This flexibility lets you refresh your look whenever desired.
Consider using your ladder for more than just blankets. Hang towels in the bathroom or decorative items in other areas.
Both projects cost under $20 when using smart material choices. They deliver significant style impact for minimal investment.
Your room feels warmer and more inviting with these cozy additions. They add both comfort and personality to your personal space.
These practical updates enhance your daily experience at home. You create a welcoming environment that truly reflects your unique taste.
Beginner-Friendly Woodworking Projects for Your Bedroom
Woodworking might seem intimidating, but it’s an excellent way to add custom charm to your space. With basic tools and clear instructions, you can create beautiful, functional pieces that reflect your unique style.
These projects build confidence while producing durable additions to your home. You’ll enjoy the satisfaction of making something with your own hands.
Construct a DIY Hanging Shelf
Create a modern wall feature that saves floor space while displaying your favorite items. Start by cutting wood boards to your desired dimensions using a saw.
Assemble the pieces with screws for a sturdy structure. Add leather straps for hanging, creating a floating effect that looks contemporary.
This project provides perfect display space for books or decorative pieces. It adds personality to any room without overwhelming the area.
Follow plans carefully for safety and precision. Measure twice before cutting to ensure perfect results.
Build a Rustic End Table from Basic Boards
Construct a sturdy table using simple 2×4 and 2×2 boards. This piece offers valuable surface area beside your bed for lamps or nighttime essentials.
Sand all surfaces smooth before applying your chosen finish. Staining creates a beautiful look that matches your existing decor.
You can personalize with colors from dark walnut to light oak. This customization ensures your table complements your room’s design perfectly.
Basic tools like a drill and saw make this project accessible. Take your time for professional-looking results.
Both projects offer significant advantages for your space:
- Affordability – Materials cost under $30 total
- Durability – Wood creations last for years
- Functionality – Added storage and surface space
- Personalization – Match your exact style preferences
Start with the shelf project to practice basic skills. Then move to the table when you feel more confident.
Woodworking projects may require more time than other crafts. The investment pays off with long-lasting, beautiful additions to your room.
For more inspiration on simple woodworking projects, explore this helpful guide.
Whether you’re new to building or have some experience, these ideas deliver satisfying results. They add handmade charm and practicality to your personal space.
Your Journey to a Perfectly Personalized Bedroom Retreat
Transforming your room into a sanctuary you adore is within reach. These projects offer a wonderful way to express your style without spending a fortune.
Start with one idea that excites you. Gradually build a cohesive look that feels uniquely yours. Every piece you create adds personality and meaning to your home.
The pride of making something with your own hands is priceless. Your space becomes a true reflection of who you are. It brings daily joy and reduces stress.
Remember, this is an ongoing process. You can always update or add new items as your tastes change. Mistakes simply add character and tell your story.
For more inspiration on simple projects, explore these DIY bedroom decor ideas. Share your favorite creation or begin your journey today!
Embrace your creativity and craft a retreat you’ll love coming home to.